Four Penny Black Cards

This past week I had the pleasure of being featured on the main Penny Black blog, using new products from their latest catalogues Be Merry and Hello Autumn. I had a lot of fun making these clean and simple cards.

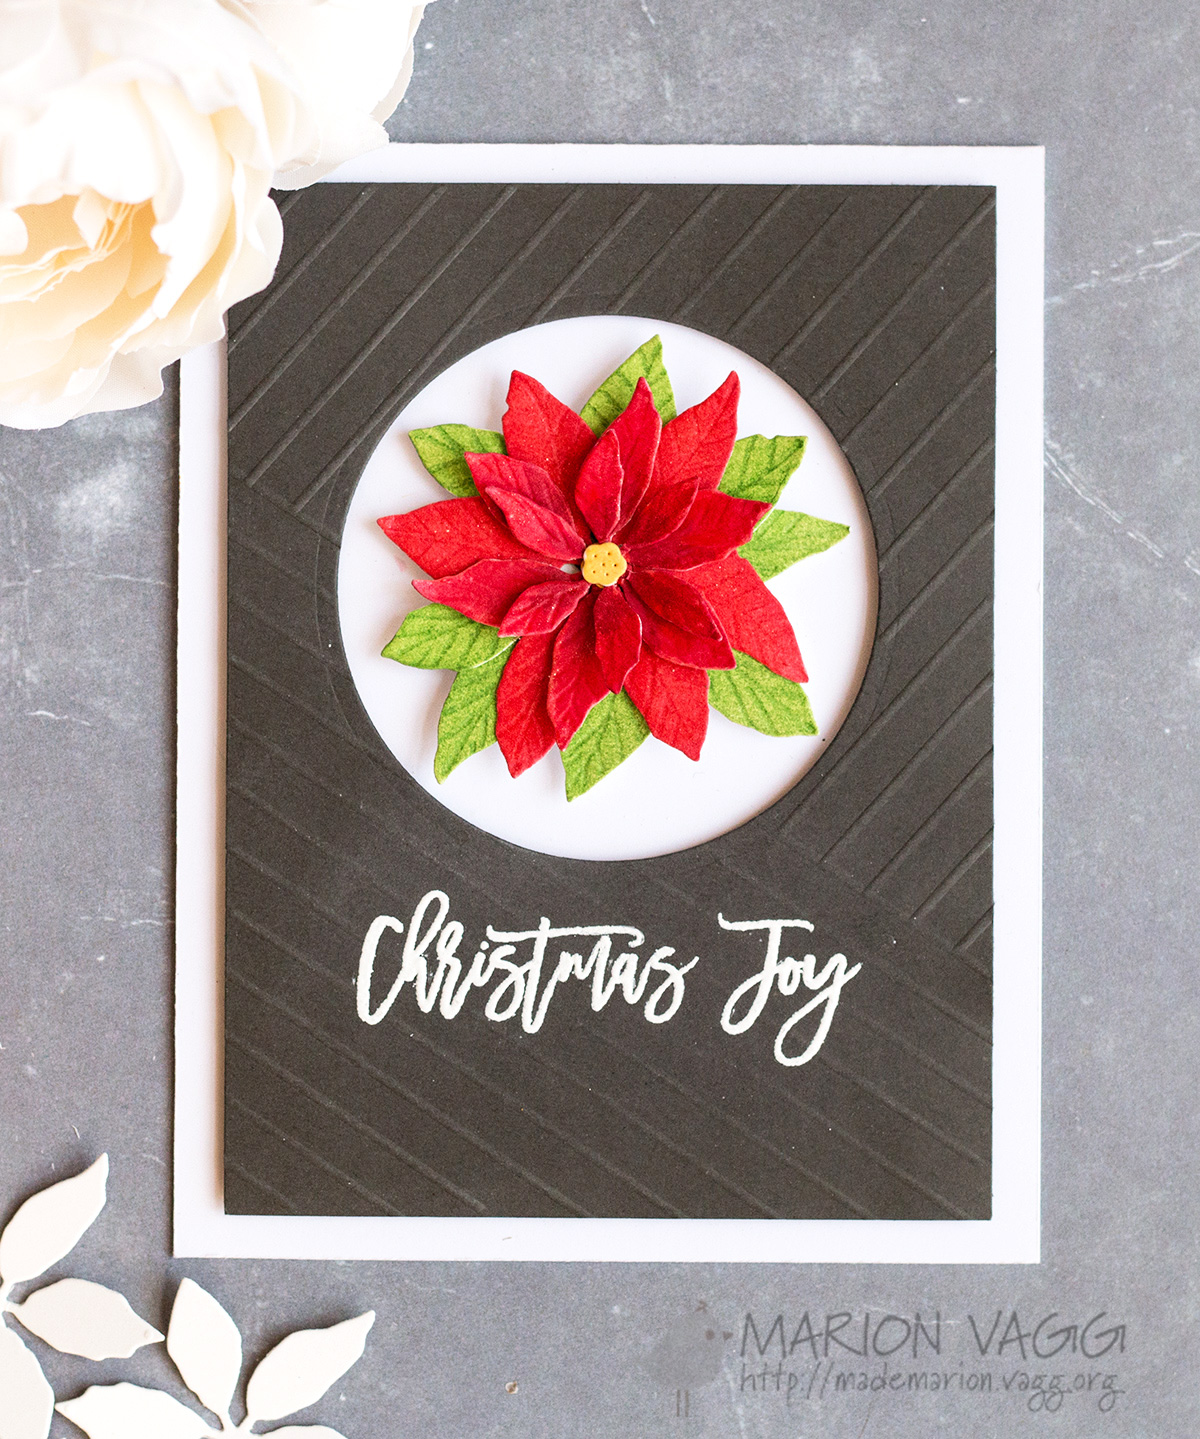
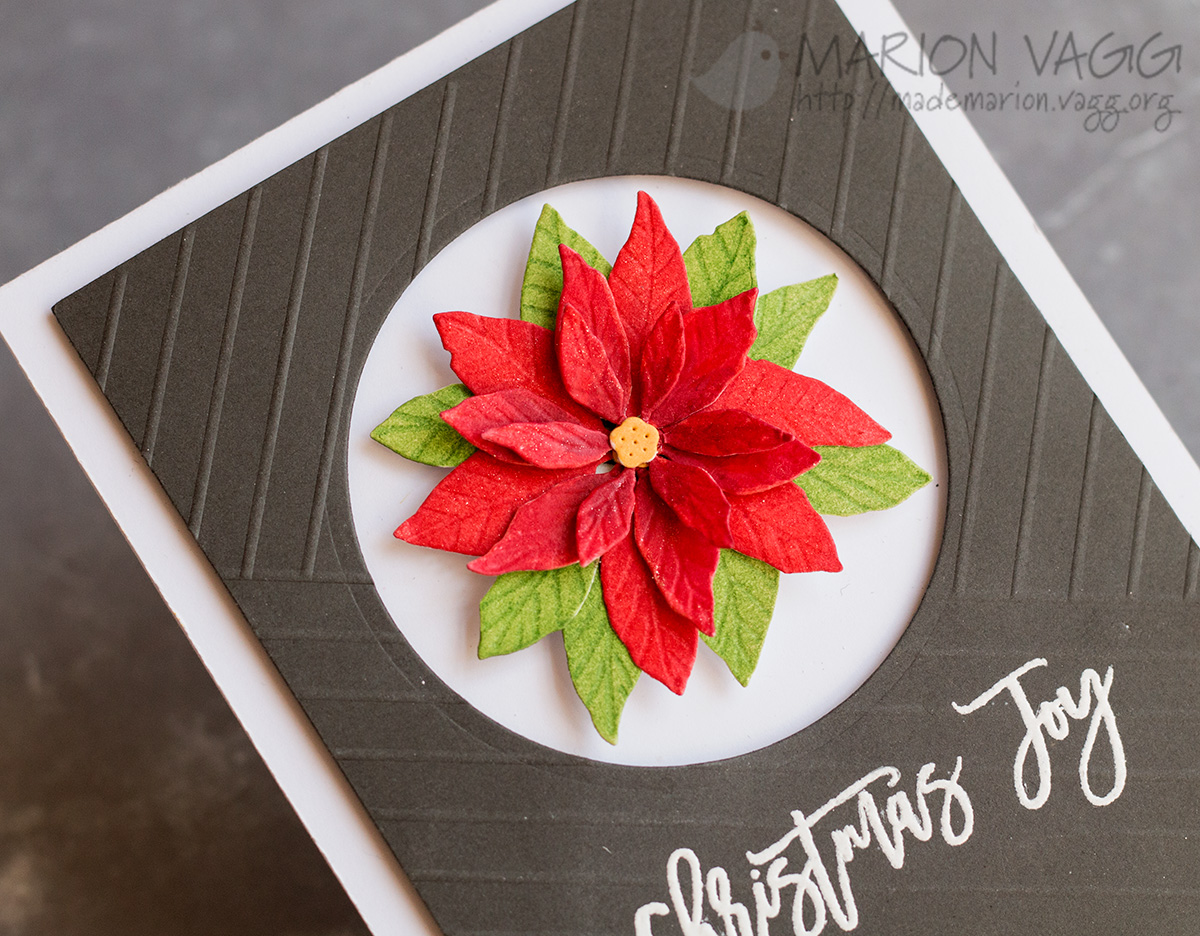
Day 1’s card used the wonderful Layered Poinsettia die and the sentiment came from the Gather Around stamp set. I added score lines to the petals and leaves with a scoring stylus and coloured them with Distress Inks. I custom made the grey panel by scoring lines on a score board.

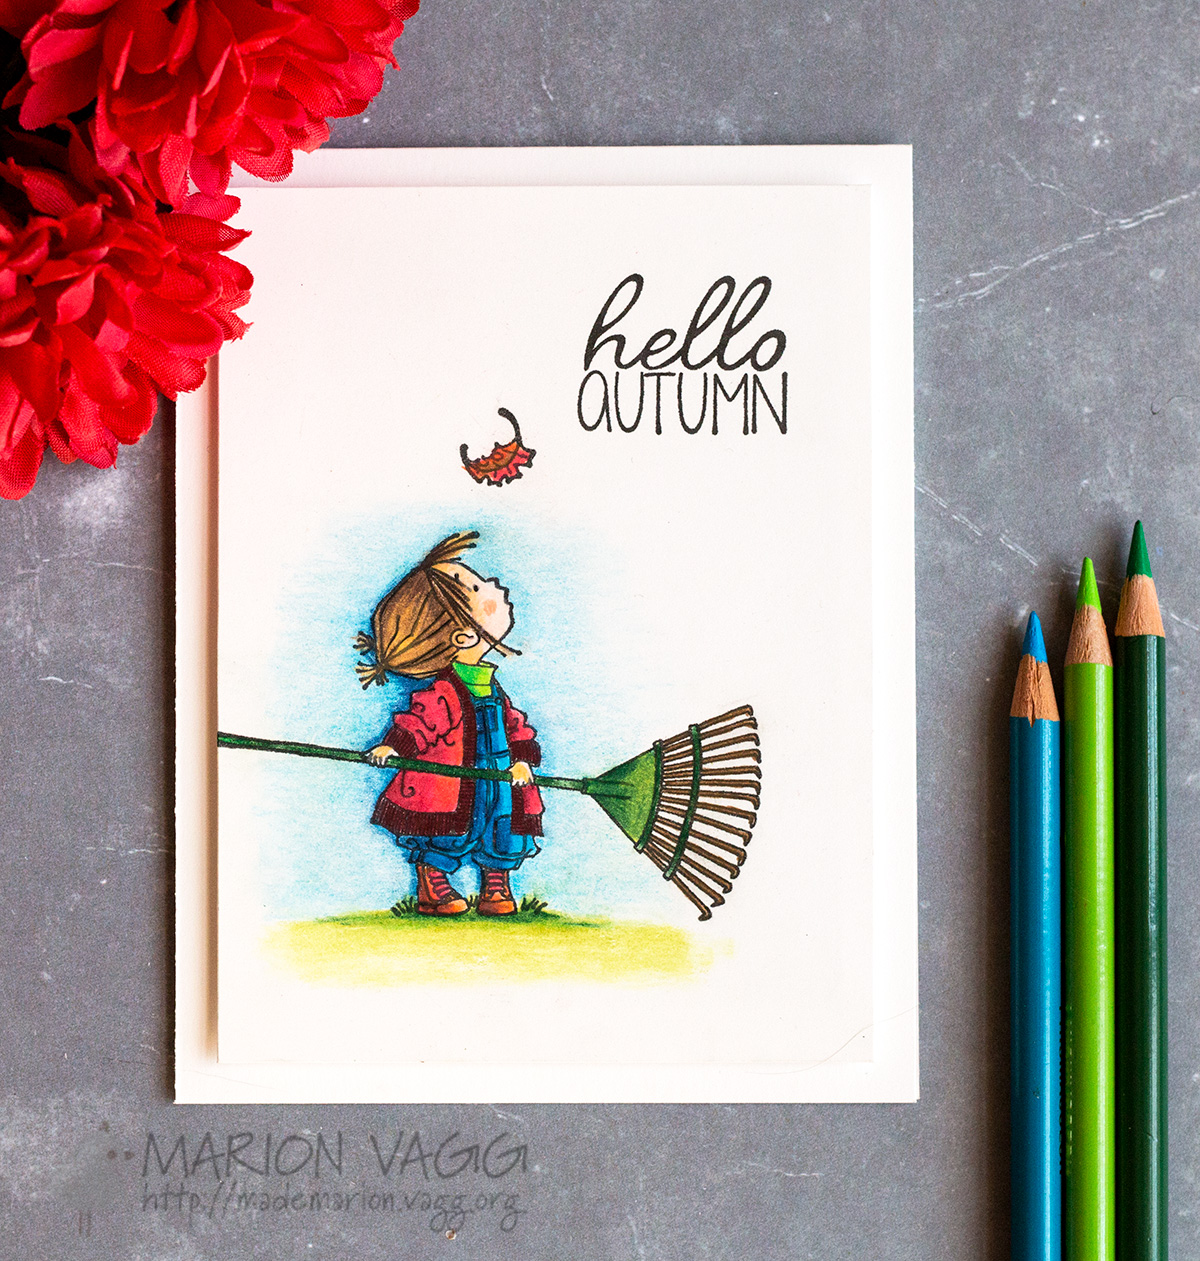
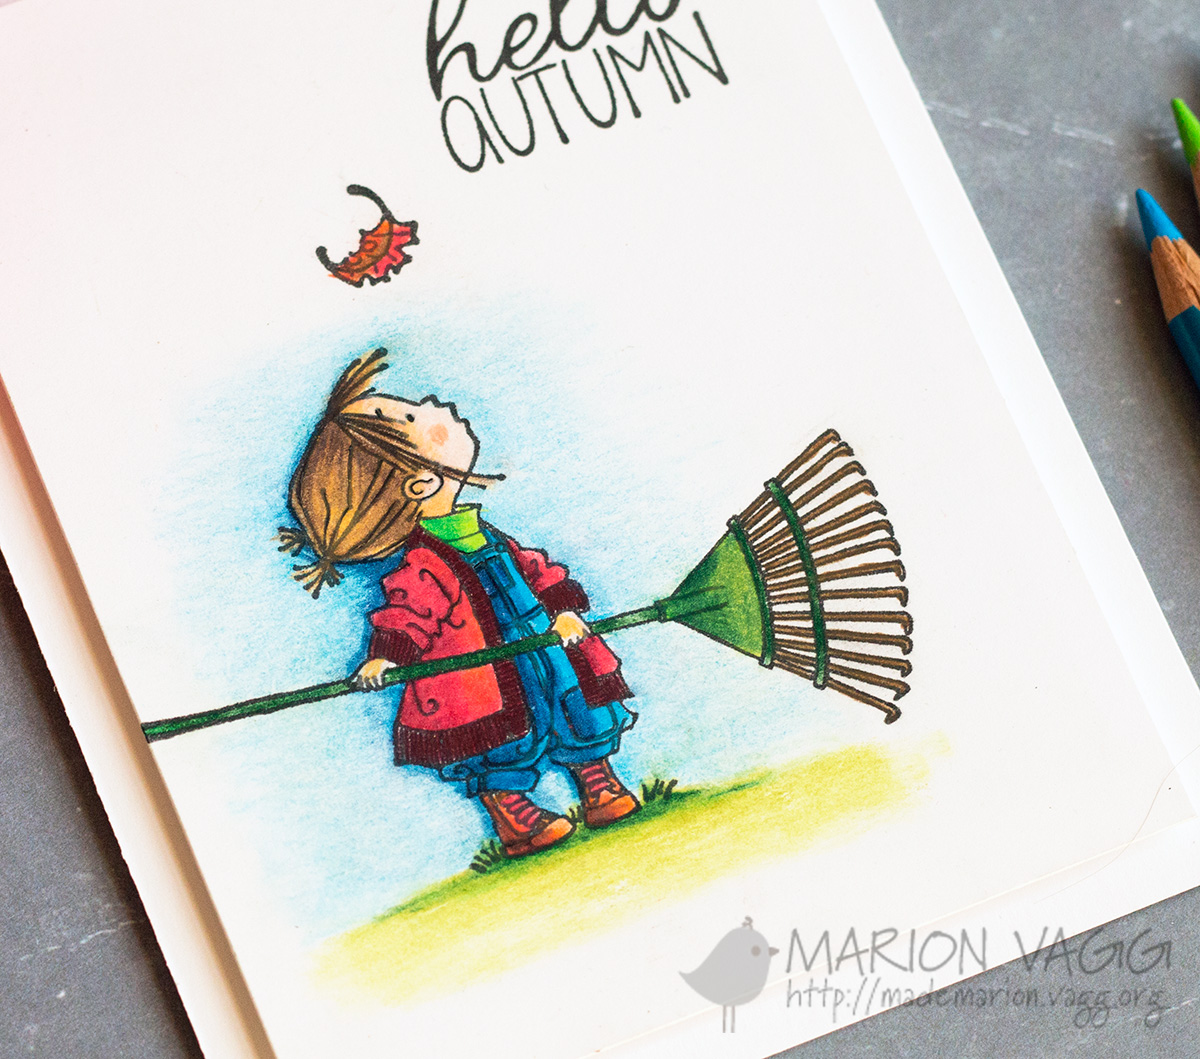
Day 2’s card used the Hello Autumn stamp set and was coloured with Prismacolor pencils and Gamsol.

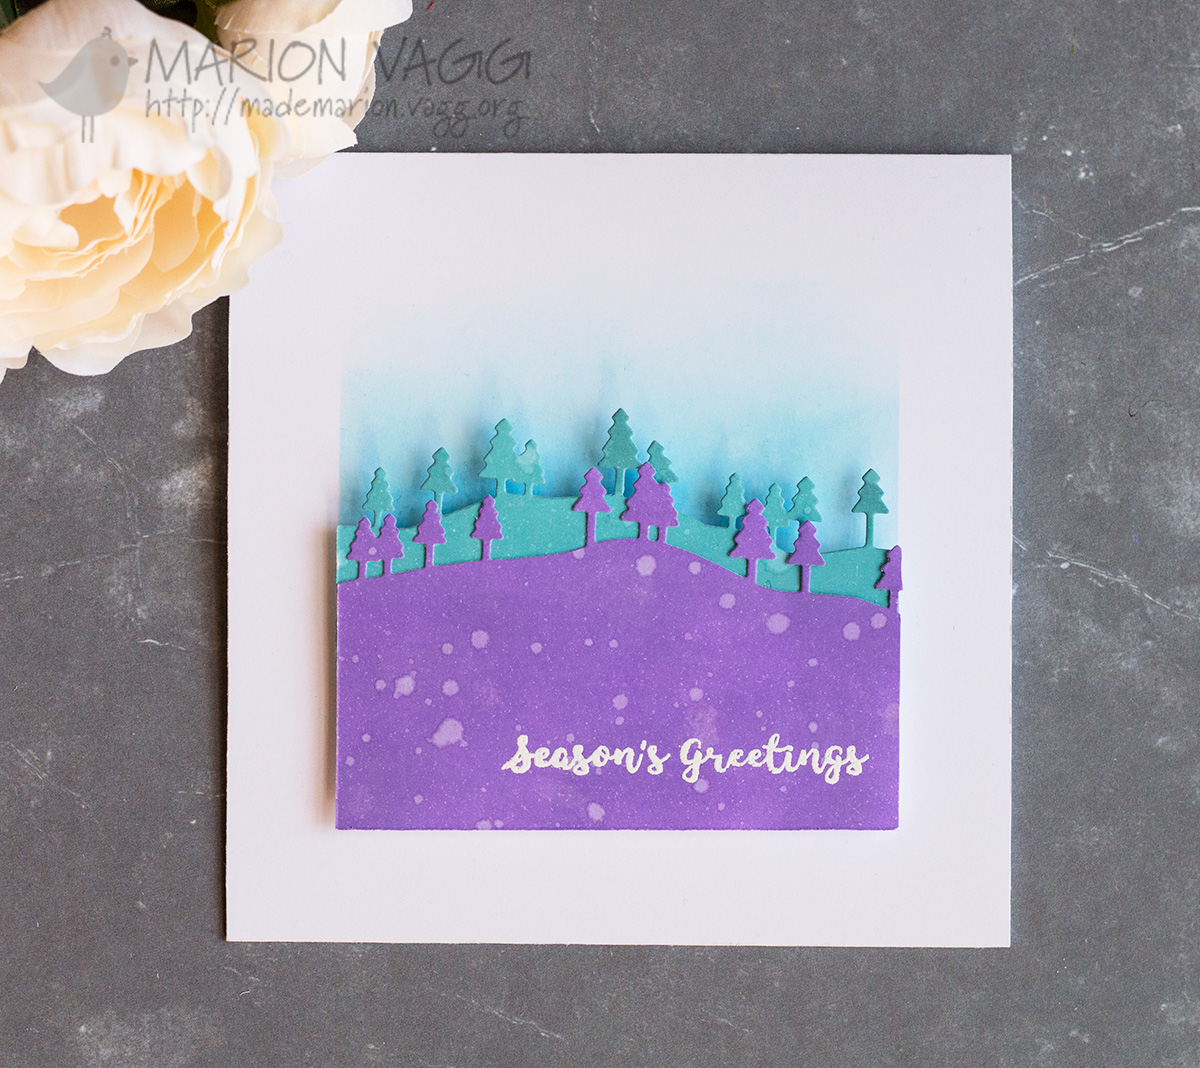
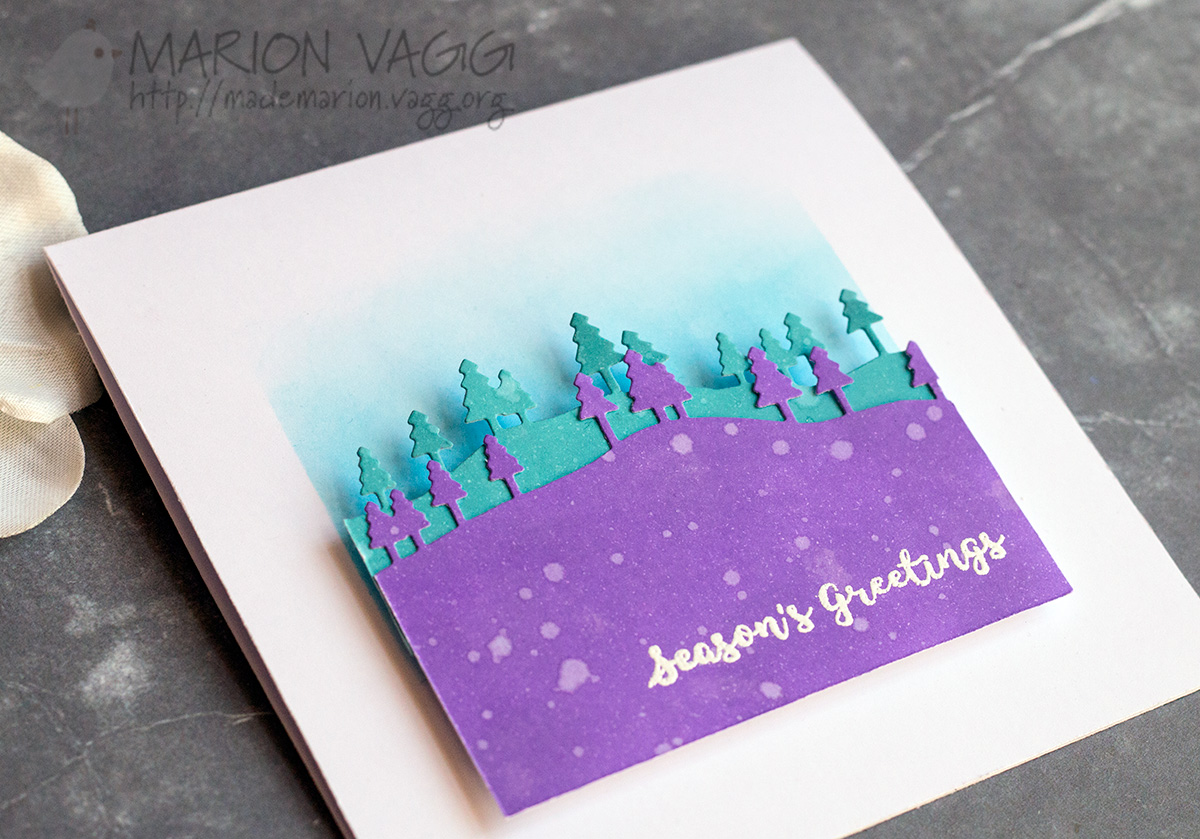
Day 3’s card used the Hills and Trees Creative die. I love the unusual colour combo which I created effortlessly with Oxide Distress Inks. The sentiment is from the Banner Sentiments set.

And my final Day 4 card is probably my favourite of them all. Aren’t these mice adorable? They are from the Gather Around stamp set.

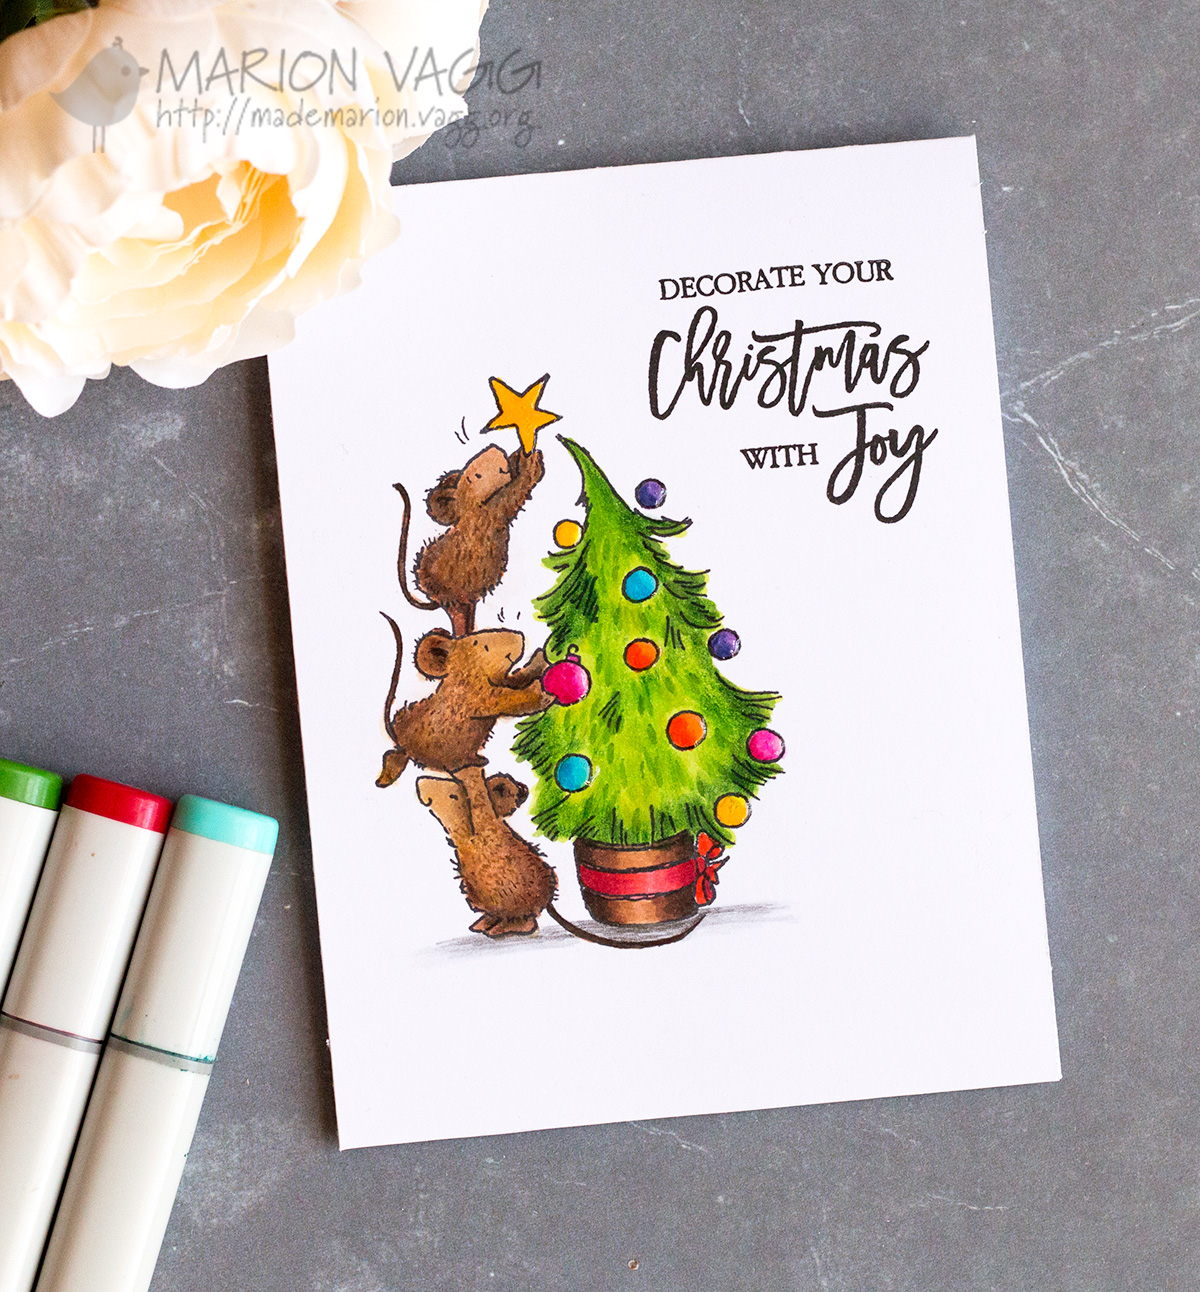
I coloured them with Copic markers, and then added in all the details (such as the fur on the mice) with Prismacolor pencils.


Supplies

For a full list of supplies and instructions, click on the link for each Day’s card and it will take you to the original blog post.


Thanks for sticking with me! That was a long post.

Marion

Save

Read More

You are Awesome

simplicity sister

I’ve recently purchased some Distress Oxide inks – and I am in love with them! I love the creaminess of them and they are soooo easy to blend! I only have 4 colours at the moment, but I will definitely be adding a few more to my stash soon…

Today’s technique has been borrowed by the extremely talented Jennifer McGuire and in particular this post here. I wanted to try this same technique with some Penny Black supplies and it worked so beautifully.

First up I blended some Cracked Pistachio, Wilted Violet and Worn Lipstick Distress Oxide inks onto some watercolour card stock. Did I mention that these babies blend like butter (to borrow a catch phrase from Laura Bassen)? I took the Penny Black Hypnotic stencil and sprayed it with a fine mist of water. I placed this face down onto the blended panel and let it sit for 5 mins or so while it did its thing.

The sentiment is from a Penny Black Creative die set called Awesome.  I borrowed a technique that Therese Calvird uses regularly where she die cuts the sentiment from fun foam and then adheres the card stock sentiment over the top. I don’t know why I haven’t tried it before, but it worked a treat too.

Penny Black products used:
Penny Black 51-333 Awesome Creative Die set
Penny Black 25-015 Hypnotic Stencil

Supplies

Stamps: None

Card: X-Press It blending card, Watercolour card stock, Grey Card stock

Ink: Distress Oxide Ink – Cracked Pistachio, Wilted Violet, Worn Lipstick

Other Supplies: Penny Black Awesome Creative die set, Cuttlebug, Penny Black Hypnotic stencil, Water mister, Liquid adhesive, Ink blending tool, Fun Foam

I hope you are having a wonderful day.
Thanks for stopping by,

Marion

Save

Read More

Unicorns and Rainbows – Jane’s Doodles

Jane's Doodle Banner

My daughter was invited to a unicorn and rainbow themed birthday party last weekend, so that called for Jane’s Unicorn set.

I started by die cutting a tag from blue cardstock. I then die cut a cloud border die from masking paper and used an ink blending tool and some Salty Ocean Distress ink to create the clouds. Then it was a simple matter of stamping the rainbow and unicorn onto some white card stock and colouring them with Copic markers. After fussy cutting them out, I added several layers of a Wink of Stellar clear glitter brush pen to the rainbow and wings/mane. It is very shimmery in real life, but isn’t captured in the photo. The sentiment is from the Cake! stamp set.

Supplies

Stamps: Jane’s Doodles Unicorn and Cake! stamp sets

Card: X-Press It blending card, Simon Says Stamp Surf Blue

Ink: VersaFine – Onyx Black ink, Memento – Tuxedo Black ink,  Distress ink – Salty Ocean

Other Supplies: Paper Smooches Tag die, Poppy Stamps dies – Puffy Cloud Border, Cuttlebug, Copic markers, Ink blending tool, Inkadinkadoo Masking Paper, Hole Punch, Cotton thread, Wink of Stellar glitter brush pen – Clear

Thanks for visiting today,

Marion

Save

Save

Save

Read More

Thank You – Jane’s Doodles

Jane's Doodle Banner

I had a card over on the Jane’s Doodles blog earlier this week. It uses two (of three) new stamp sets that have just been released into the store – Bloom and Mother’s Day. I’m really loving the Bloom set, as I simply love floral stamp sets, and this one doesn’t disappoint.

These flowers were coloured with a mixture of Copic markers and Prismacolor pencils. I laid a base of Copic colour, but ended up adding the detail with Prismacolor pencils. I lost count of all the colours I used! I just enjoyed the colouring process. Once coloured, I fussy cut the flowers and leaves out. The sentiment is part of a larger sentiment – I just did some stamp surgery. A touch of subtle ink blending in the background was all that was needed to finish the card off, before putting it onto a blue note card.

I wasn’t able to participate in the blog hop last week, as my stamps didn’t arrive in time. I encourage you, if you haven’t done so already, to take the hop and see what the other DT members created with this new release. Start the hop here.

Supplies

Stamps: Jane’s Doodles Bloom and Mother’s Day stamp sets

Card: X-Press It blending card, Hero Arts Cerulean Layering Paper, Black card stock

Ink: Versamark ink, Memento – Tuxedo Black, Distress Ink – Peacock Feathers

Other Supplies: Copic markers, Prismacolor pencils, Gamsol and blending stumps, Ink blending tool, Hero Arts white embossing powder, Heat tool, Anti-static powder bag

Thanks for visiting today,

Marion

Save

Save

Save

Read More

Tweet Hugs – Jane’s Doodles

Jane's Doodle Banner

I have a sweet card to share with you today featuring Jane’s Love Birds set. I simply adore this set! Head over to the Jane’s Doodle blog to see the post there.

I wasn’t sure where I was going with this card, so when I don’t know, I usually just stamp, colour (in this case with Copics) and fussy cut the images. This is what I did with this one. To add some interest to the blue card base, I stamped some hearts from the Love stamp set to create a tone on tone effect – subtle and not too overpowering.

Supplies

Stamps: Jane’s Doodles Love Birds and Love stamp sets

Card: X-Press It blending card, Hero Arts layering papers – Cerulean

Ink: Memento Tuxedo Black ink, Hero Arts Shadow ink – Pool, Soft Pool, Distress Ink – Salty Ocean

Other Supplies: Copic Markers, Fun foam, Lawn Fawn Say Cheese die, Cuttlebug, Ink Blending tool

Thanks for stopping by,

Marion

Save

Save

Read More