I Love You SNOW Much – Jane’s Doodles

Jane's Doodle Banner

Hello! I’ve made a cute Christmas shaker card using Jane’s Doodles stamps. You can view the post here on the Jane’s Doodles blog.

I don’t often make shaker cards, but I had an idea to make a snow dome card and I managed to do this with some partial die cutting. I partially die cut a circle and then cut the flat bottom section of the dome using a craft knife and ruler. I need to remember to do partial die cutting more often.

To keep this shaker card simple, I coloured, cut and adhered the trees and reindeer from the Winter Fun stamp set on top of the acetate window, rather than behind. I blended in some ink to create a snowy backdrop behind the acetate. I filled the window with some tiny star sequins. I love how it turned out.

Supplies

Stamps: Jane’s Doodles Winter Fun stamp set

Card: X-Press It blending card

Ink: Memento Tuxedo Black ink, VersaFine – Onyx Black ink, Distress Oxide Inks – Wilted Violet, Broken China

Other Supplies: Copic Markers, Acetate, Fun foam, Uniball Signo white gel pen, Martha Stewart sequins, Spellbinders standard Circle die, Cuttlebug, Ink Bending tool, Masking paper

How is your Christmas card stash coming along?

Thanks for stopping by,

Marion

Save

Read More

Four Penny Black Cards

This past week I had the pleasure of being featured on the main Penny Black blog, using new products from their latest catalogues Be Merry and Hello Autumn. I had a lot of fun making these clean and simple cards.

Day 1’s card used the wonderful Layered Poinsettia die and the sentiment came from the Gather Around stamp set. I added score lines to the petals and leaves with a scoring stylus and coloured them with Distress Inks. I custom made the grey panel by scoring lines on a score board.

Day 2’s card used the Hello Autumn stamp set and was coloured with Prismacolor pencils and Gamsol.

Day 3’s card used the Hills and Trees Creative die. I love the unusual colour combo which I created effortlessly with Oxide Distress Inks. The sentiment is from the Banner Sentiments set.

And my final Day 4 card is probably my favourite of them all. Aren’t these mice adorable? They are from the Gather Around stamp set.

I coloured them with Copic markers, and then added in all the details (such as the fur on the mice) with Prismacolor pencils.


Supplies

For a full list of supplies and instructions, click on the link for each Day’s card and it will take you to the original blog post.


Thanks for sticking with me! That was a long post.

Marion

Save

Read More

You are Awesome

simplicity sister

I’ve recently purchased some Distress Oxide inks – and I am in love with them! I love the creaminess of them and they are soooo easy to blend! I only have 4 colours at the moment, but I will definitely be adding a few more to my stash soon…

Today’s technique has been borrowed by the extremely talented Jennifer McGuire and in particular this post here. I wanted to try this same technique with some Penny Black supplies and it worked so beautifully.

First up I blended some Cracked Pistachio, Wilted Violet and Worn Lipstick Distress Oxide inks onto some watercolour card stock. Did I mention that these babies blend like butter (to borrow a catch phrase from Laura Bassen)? I took the Penny Black Hypnotic stencil and sprayed it with a fine mist of water. I placed this face down onto the blended panel and let it sit for 5 mins or so while it did its thing.

The sentiment is from a Penny Black Creative die set called Awesome.  I borrowed a technique that Therese Calvird uses regularly where she die cuts the sentiment from fun foam and then adheres the card stock sentiment over the top. I don’t know why I haven’t tried it before, but it worked a treat too.

Penny Black products used:
Penny Black 51-333 Awesome Creative Die set
Penny Black 25-015 Hypnotic Stencil

Supplies

Stamps: None

Card: X-Press It blending card, Watercolour card stock, Grey Card stock

Ink: Distress Oxide Ink – Cracked Pistachio, Wilted Violet, Worn Lipstick

Other Supplies: Penny Black Awesome Creative die set, Cuttlebug, Penny Black Hypnotic stencil, Water mister, Liquid adhesive, Ink blending tool, Fun Foam

I hope you are having a wonderful day.
Thanks for stopping by,

Marion

Save

Read More

Colourful Tags – Jane’s Doodles

Jane's Doodle Banner

Hello! It’s been quite sometime since I last posted. There has been good reason for my absence – My hubby and I went on a little vay-cay (without the kids mind you) to Canada! We had an awesome time and loved experiencing such a beautiful country. I won’t bore you with details here, but you may have seen a few photos I put up over on Instagram (@marionvagg).

Today I have some playful tags to share with you, using a variety of Jane’s Doodles stamp sets. You can see them also on the Jane’s Doodle blog here.

I created the stripes in the background using the Stripes and Dots stamp set and a variety of ink colours. I overlapped the stripes, which created additional colours. The shelf was stamped from the LOVE  stamp set – it is actually a scalloped border, but I coloured it in with a black marker and it became a shelf! The plants are from the Plants and Cactus stamp sets.

Supplies

Stamps: Jane’s Doodles Plants, Cactus, LOVE and Stripes and Dots stamp sets

Card: X-Press It blending card

Ink: VersaFine – Onyx Black ink, Hero Arts inks – Pale Tomato, Bubblegum, Butter bar, Cantalope, Orange Soda, Grape Juice, Ultra Pink

Other Supplies: Paper Smooches Tag die, Cuttlebug, Hole Punch, Cotton thread, Wink of Stellar glitter brush pen – Clear, Tombow black marker

I appreciate you stopping by today,

Marion

Save

Read More

Happy Anniversary Birds – Penny Black

simplicity sister

Today I have a special anniversary card that I made for my Aunt and Uncle who have just celebrated their 50th Wedding Anniversary. Such a special milestone to celebrate, and I love how this window card turned out.

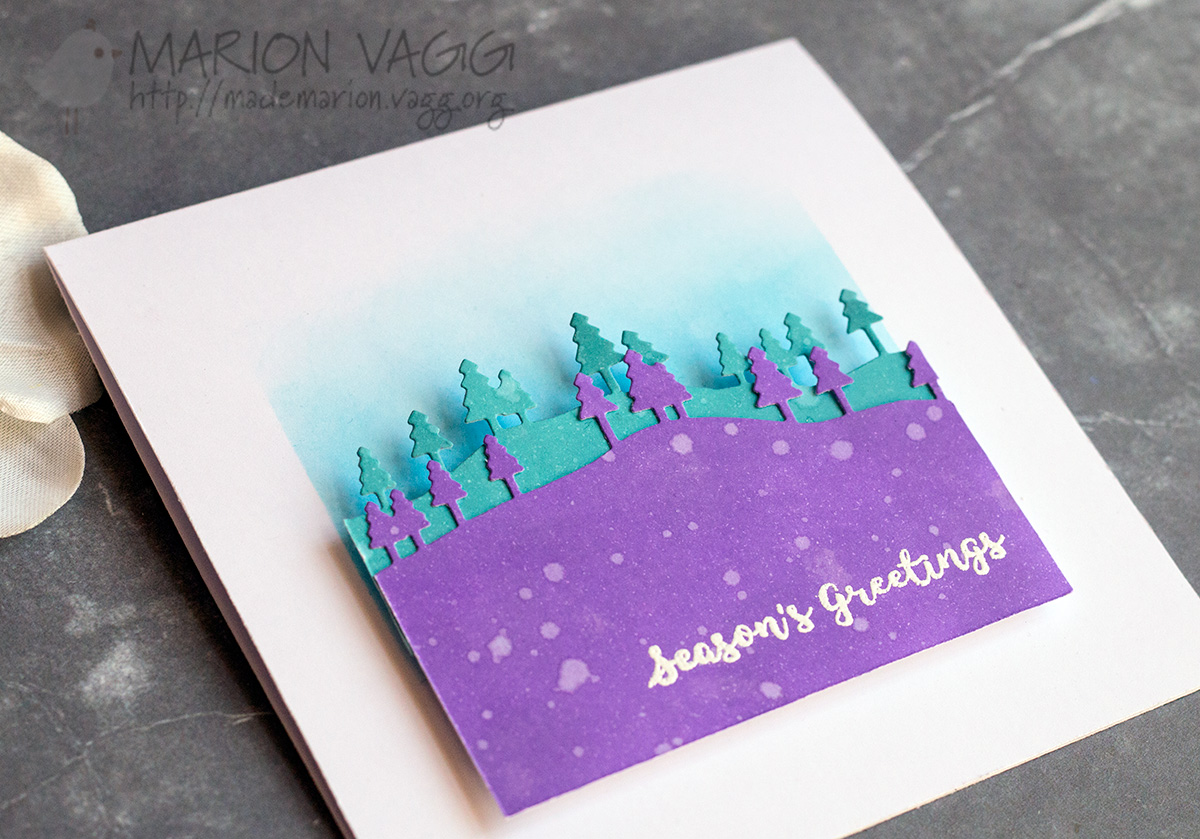
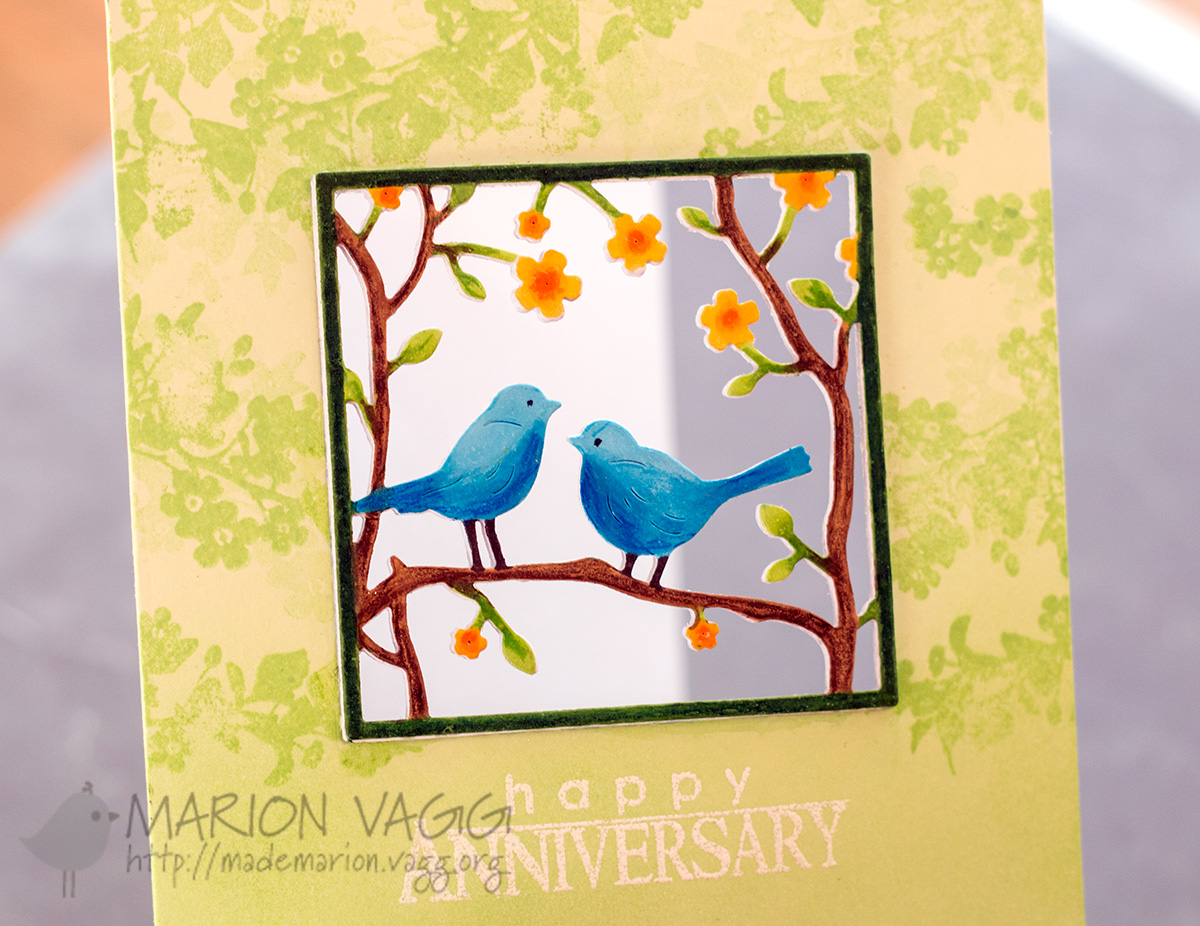
I die cut several layers (five I think) of the Penny Black layered scene from white card stock and adhered them together. Before adhering the top layer, I coloured it with a mixture of Copics and Prismacolor pencils.

I stamped some very subtle leaves from the Penny Black You + Me stamp set in green ink (first and second generation stamping) onto a green card base to add some interest.

I then used the same die cut and created a window in the front of my card and adhered the bird scene into the window. I did this by adhering it with a small amount of washi tape, that is visible on the back side of the window, but it did the trick of securing the window in place.

The sentiment is from the same set as the leaves and was white heat embossed. I felt the sentiment wasn’t visible enough, so I blended in some green ink over the sentiment and on the bottom half of the card.

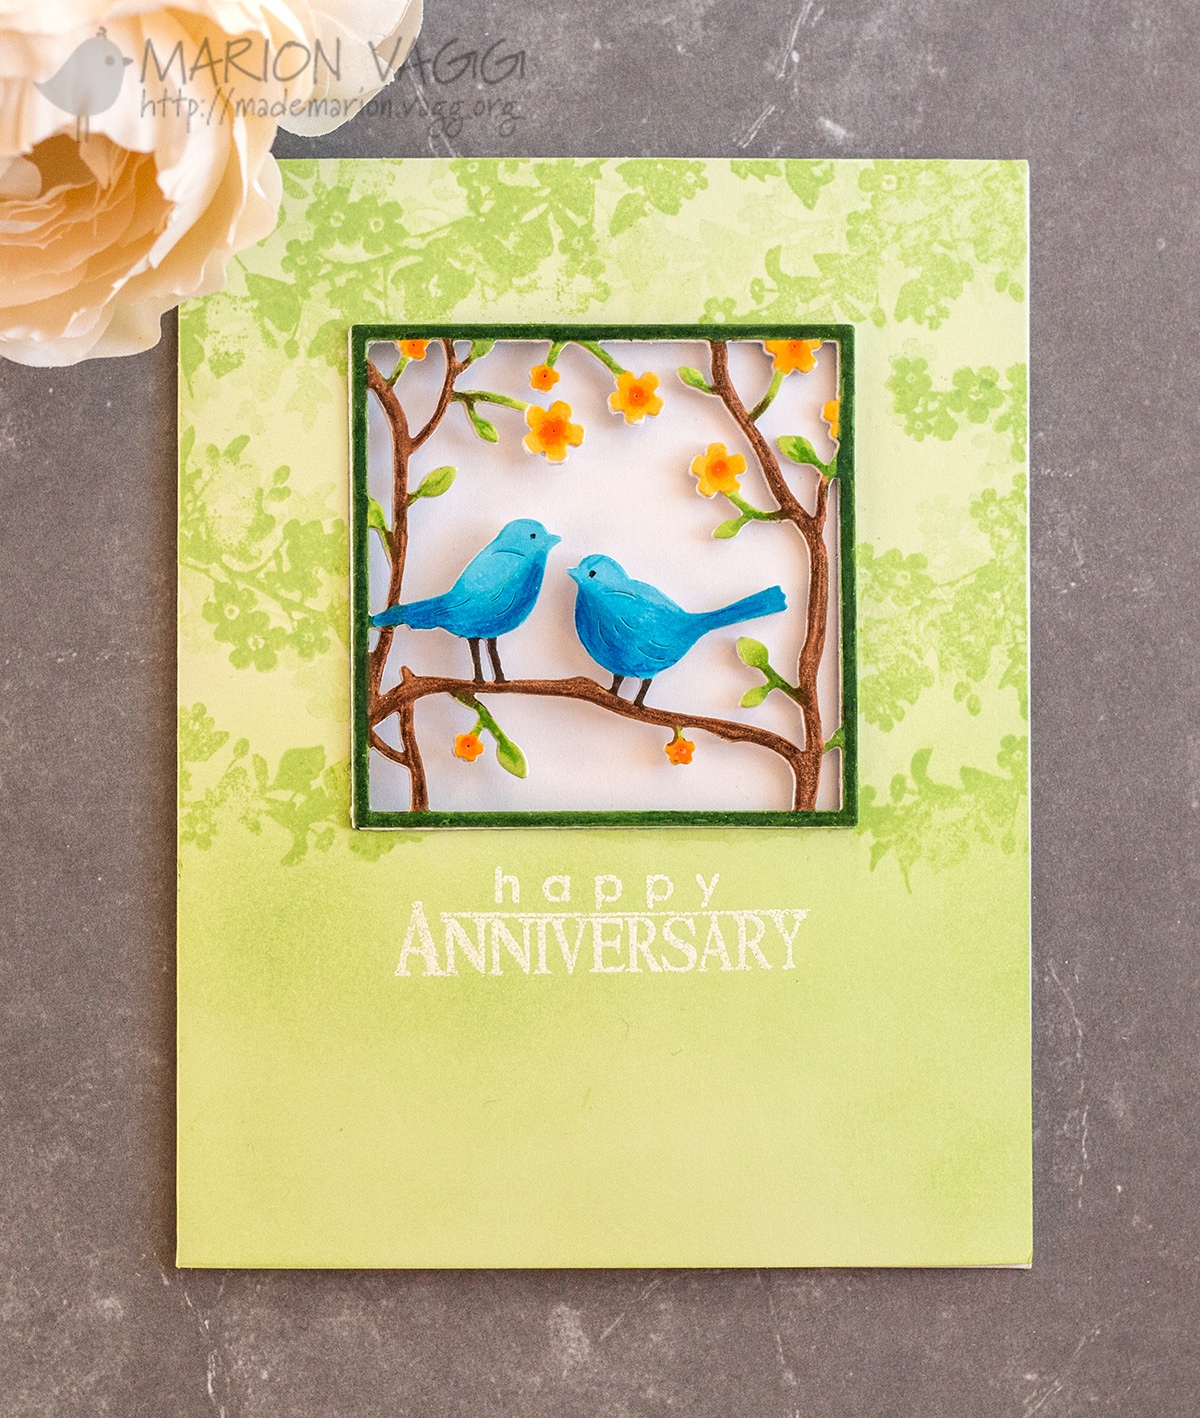
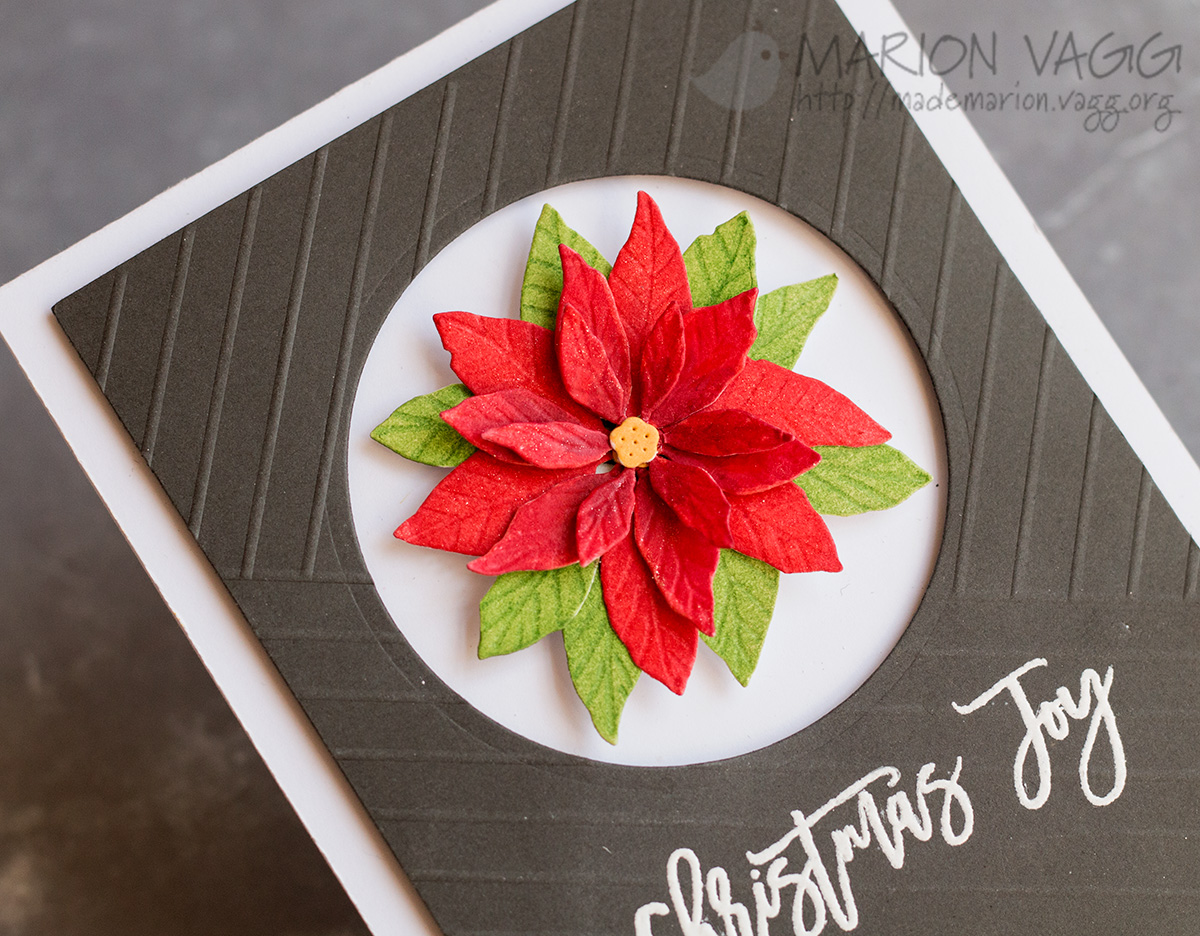
This photo shows the window element of the card better.

Penny Black products used:
Penny Black 51-232 Layered Scene Creative Die
Penny Black 30-285 You + Me Stamp set

Supplies

Stamps: Penny Black You + Me stamp set

Card: X-Press It blending card, Hero Arts Green Layering papers

Ink: Versamark ink, Hero Arts Green Hills ink

Other Supplies: Penny Black Layered Scene Creative die, Cuttlebug, Copic markers, Prismacolor pencils, White embossing powder, Heat tool, Washi tape, Liquid adhesive, Ink blending tool

I hope you are having a wonderful day.
Thanks for stopping by,

Marion

Save

Save

Save

Read More