Happy Anniversary Birds – Penny Black

simplicity sister

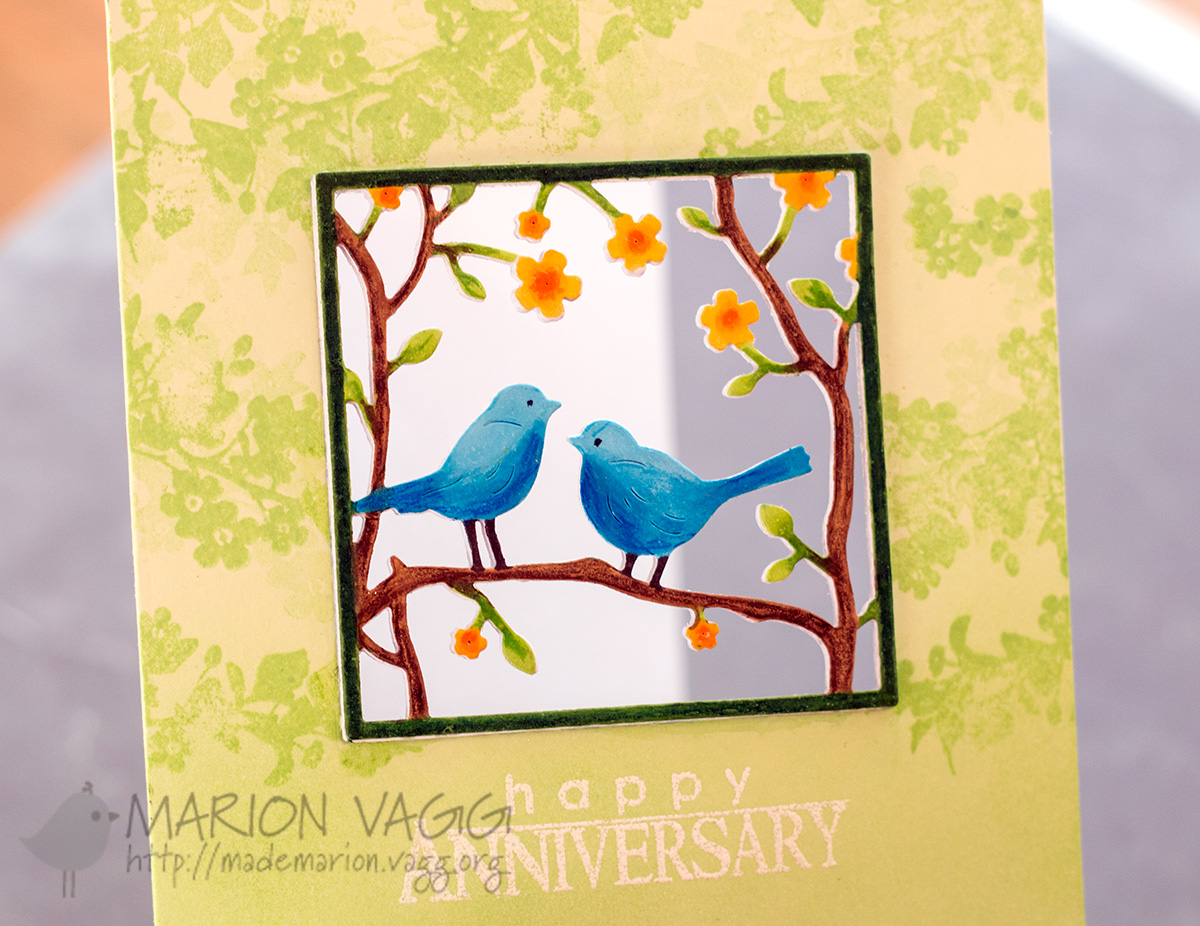
Today I have a special anniversary card that I made for my Aunt and Uncle who have just celebrated their 50th Wedding Anniversary. Such a special milestone to celebrate, and I love how this window card turned out.

I die cut several layers (five I think) of the Penny Black layered scene from white card stock and adhered them together. Before adhering the top layer, I coloured it with a mixture of Copics and Prismacolor pencils.

I stamped some very subtle leaves from the Penny Black You + Me stamp set in green ink (first and second generation stamping) onto a green card base to add some interest.

I then used the same die cut and created a window in the front of my card and adhered the bird scene into the window. I did this by adhering it with a small amount of washi tape, that is visible on the back side of the window, but it did the trick of securing the window in place.

The sentiment is from the same set as the leaves and was white heat embossed. I felt the sentiment wasn’t visible enough, so I blended in some green ink over the sentiment and on the bottom half of the card.
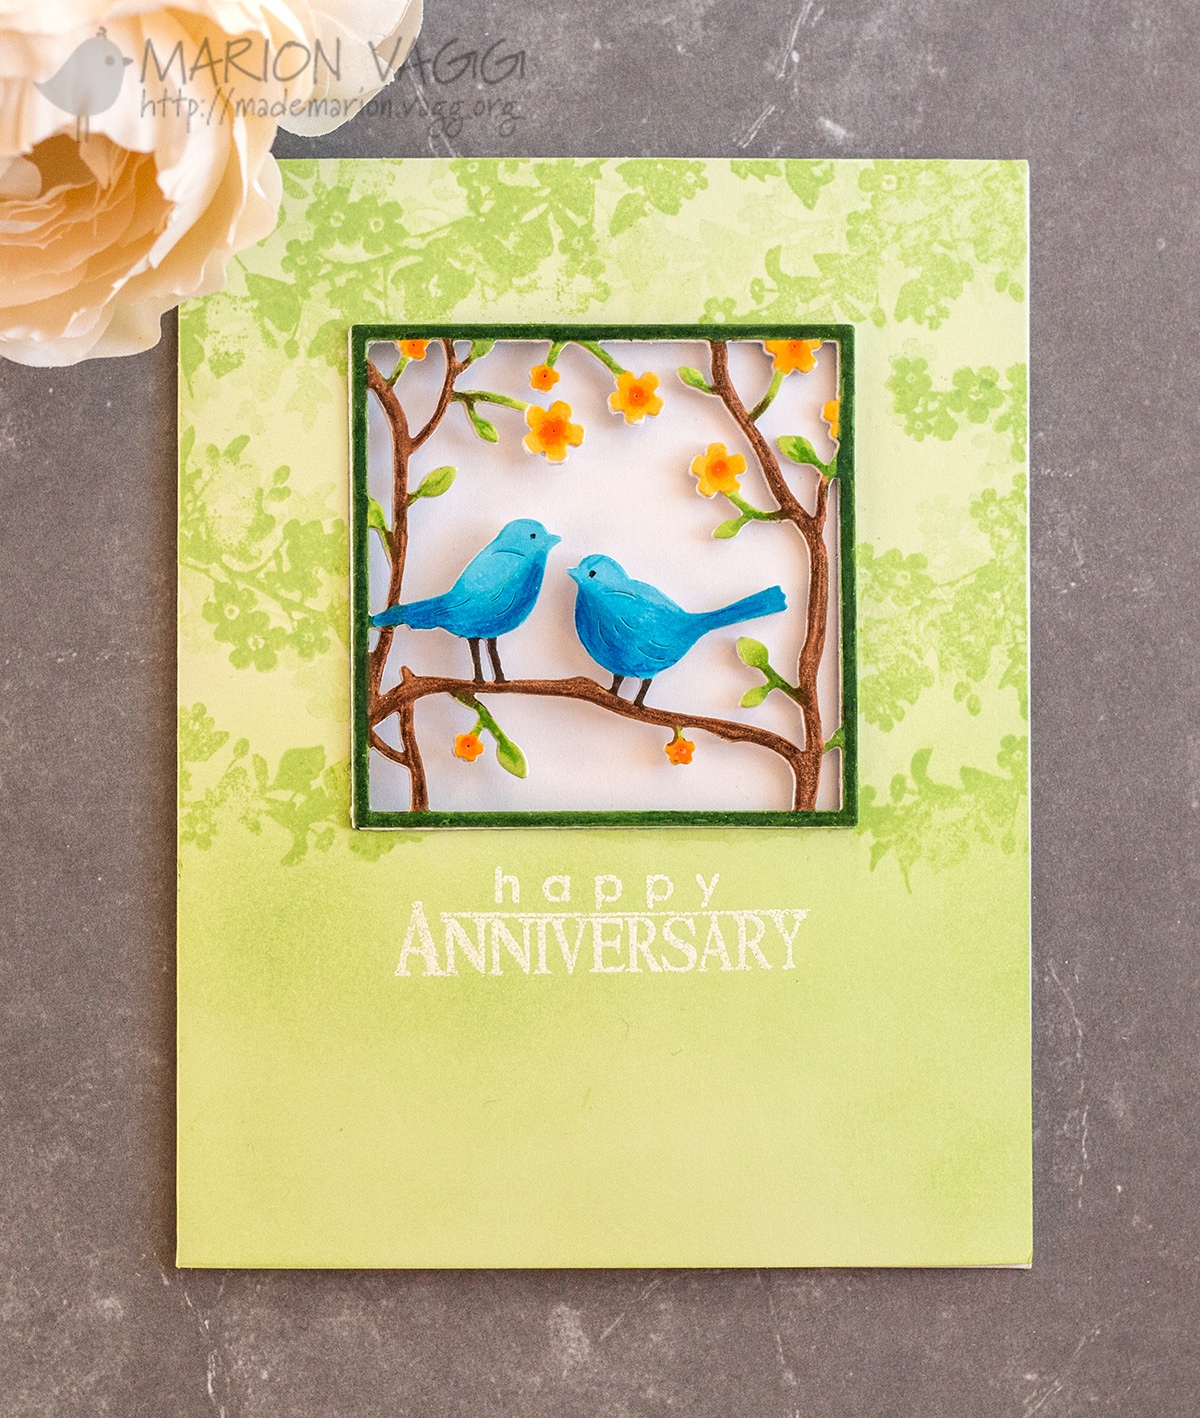
This photo shows the window element of the card better.
Penny Black products used:
Penny Black 51-232 Layered Scene Creative Die
Penny Black 30-285 You + Me Stamp set

Supplies

Stamps: Penny Black You + Me stamp set

Card: X-Press It blending card, Hero Arts Green Layering papers

Ink: Versamark ink, Hero Arts Green Hills ink

Other Supplies: Penny Black Layered Scene Creative die, Cuttlebug, Copic markers, Prismacolor pencils, White embossing powder, Heat tool, Washi tape, Liquid adhesive, Ink blending tool

I hope you are having a wonderful day.
Thanks for stopping by,

Marion

Save

Save

Save

Read More

Unicorns and Rainbows – Jane’s Doodles

Jane's Doodle Banner

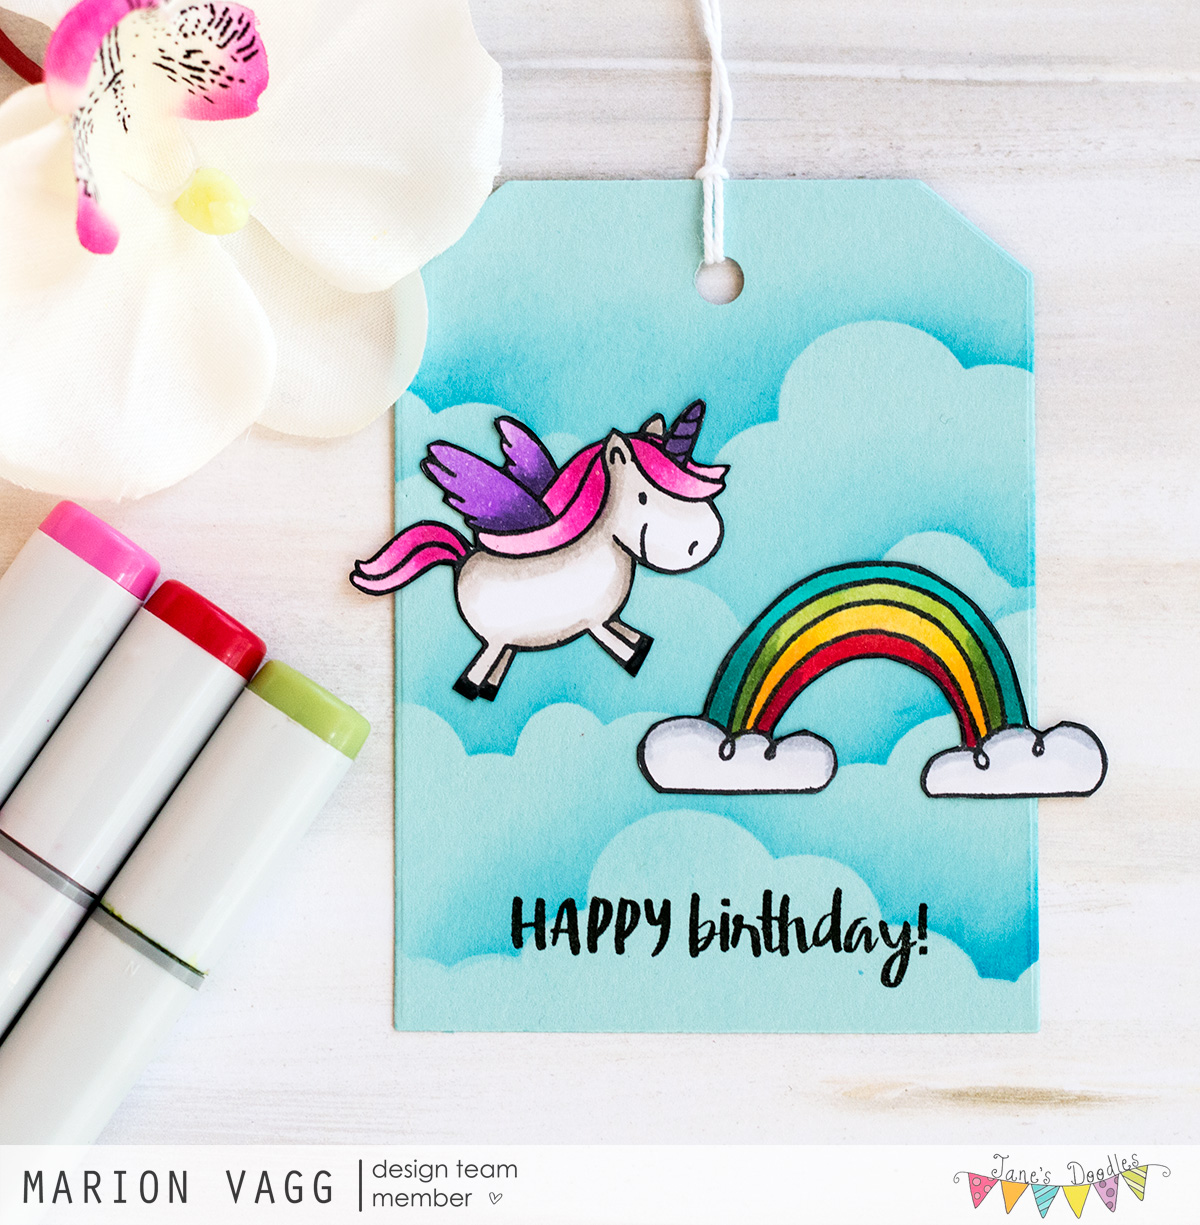
My daughter was invited to a unicorn and rainbow themed birthday party last weekend, so that called for Jane’s Unicorn set.

I started by die cutting a tag from blue cardstock. I then die cut a cloud border die from masking paper and used an ink blending tool and some Salty Ocean Distress ink to create the clouds. Then it was a simple matter of stamping the rainbow and unicorn onto some white card stock and colouring them with Copic markers. After fussy cutting them out, I added several layers of a Wink of Stellar clear glitter brush pen to the rainbow and wings/mane. It is very shimmery in real life, but isn’t captured in the photo. The sentiment is from the Cake! stamp set.

Supplies

Stamps: Jane’s Doodles Unicorn and Cake! stamp sets

Card: X-Press It blending card, Simon Says Stamp Surf Blue

Ink: VersaFine – Onyx Black ink, Memento – Tuxedo Black ink,  Distress ink – Salty Ocean

Other Supplies: Paper Smooches Tag die, Poppy Stamps dies – Puffy Cloud Border, Cuttlebug, Copic markers, Ink blending tool, Inkadinkadoo Masking Paper, Hole Punch, Cotton thread, Wink of Stellar glitter brush pen – Clear

Thanks for visiting today,

Marion

Save

Save

Save

Read More

Especially For You – Penny Black

simplicity sister

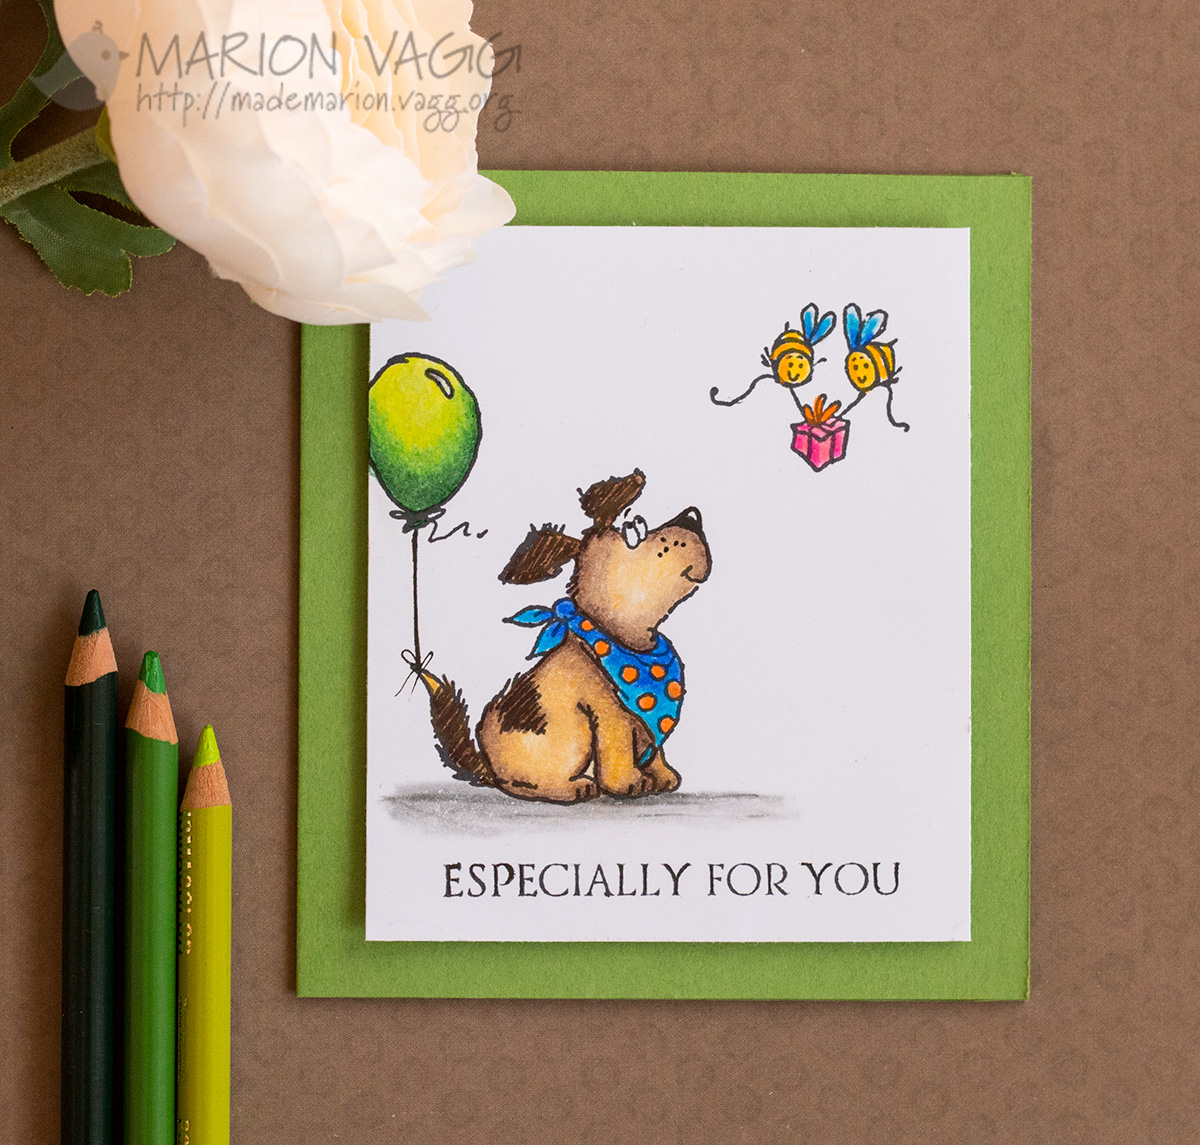
Hi friends! Today I have a card made with some pretty darn cute images from Penny Black. I’ve used the Time to Celebrate stamp set and the sentiment is from the Banners Sentiment set.

To create my scene, I stamped the cute puppy dog in Tuxedo black ink. Then I did some stamp surgery and cut off the balloon from another image in that set and stamped that above his tail. I used a Copic multiliner to draw the balloon string and attached it to the dog’s tail. Then I stamped the bees and the sentiment.

Instead of colouring with Copic markers, which is my go to medium, I decided to get out my Prismacolor pencils and Gamsol. It certainly was very therapeutic to colour!

Penny Black products used:
Penny Black 30-414 Time to Celebrate stamp set
Penny Black 30-423 Banner Sentiments

Supplies

Stamps: Penny Black Time to Celebrate and Banner Sentiments stamp set

Card: X-Press It blending card, SSS Green Card stock

Ink: Memento Tuxedo Black ink

Other Supplies: Prismacolor pencils, Gamsol, Blending stump, Copic Multiliner – 0.3

I hope you are having a wonderful day.
Thanks for stopping by,

Marion

Save

Save

Save

Read More

It’s the Little Things – Jane’s Doodles

Jane's Doodle Banner

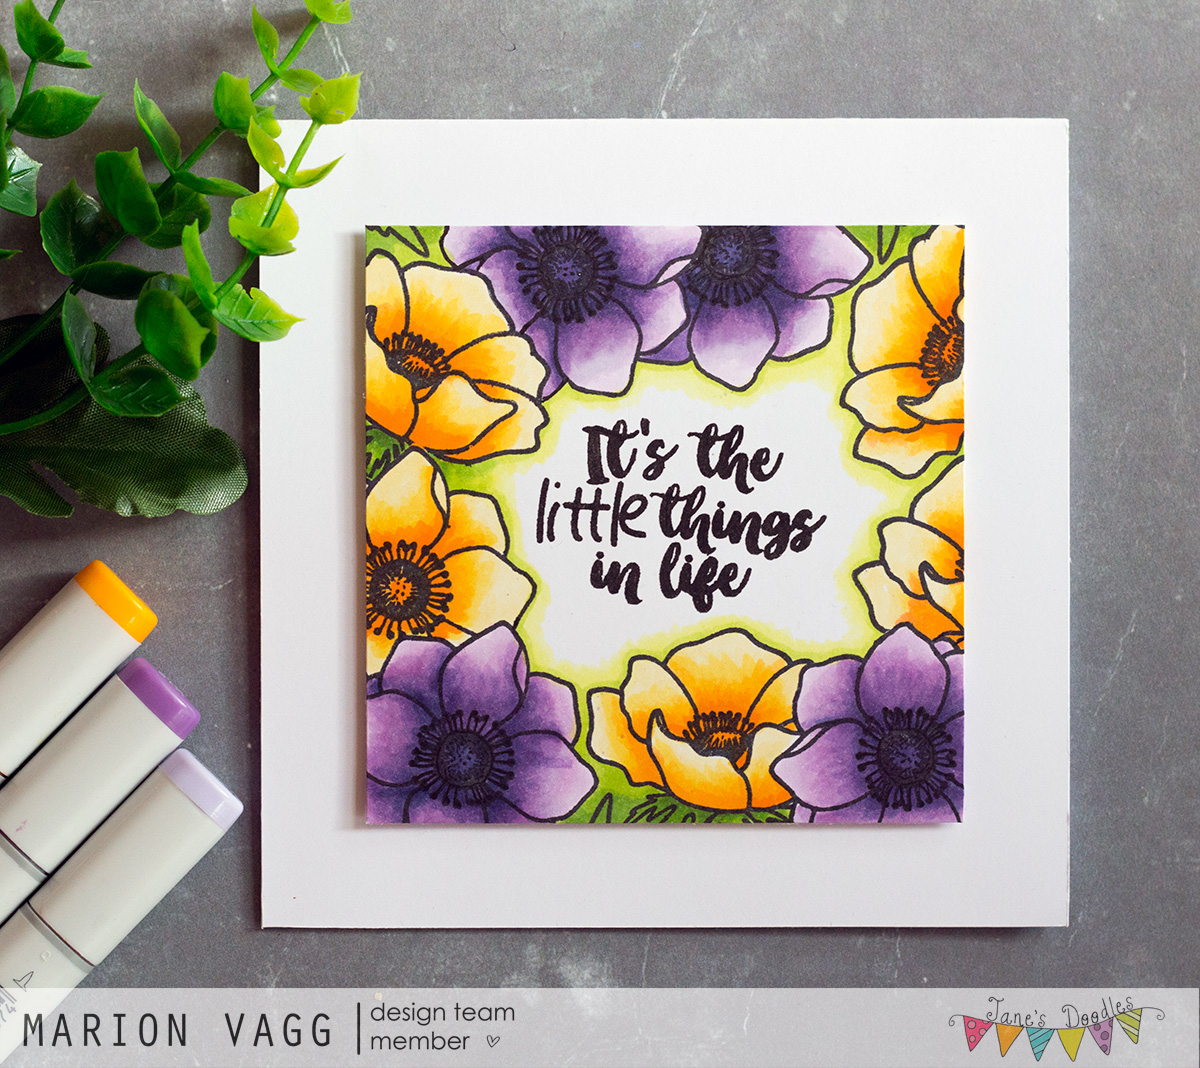
I have this card over on the Jane’s Doodles blog today. Lots of masking and Copic colouring on this one. I used the Anemone and You Got This stamp sets.

I mounted the panel onto a white note card using some fun foam.

Supplies

Stamps: Jane’s Doodles Anemone and You Got This stamp sets

Card: X-Press It blending card

Ink: Versamark ink, Memento – Tuxedo Black

Other Supplies: Copic markers, Fun foam

Short and sweet from me today,

Marion

Save

Save

Save

Read More

Tweet Hugs – Jane’s Doodles

Jane's Doodle Banner

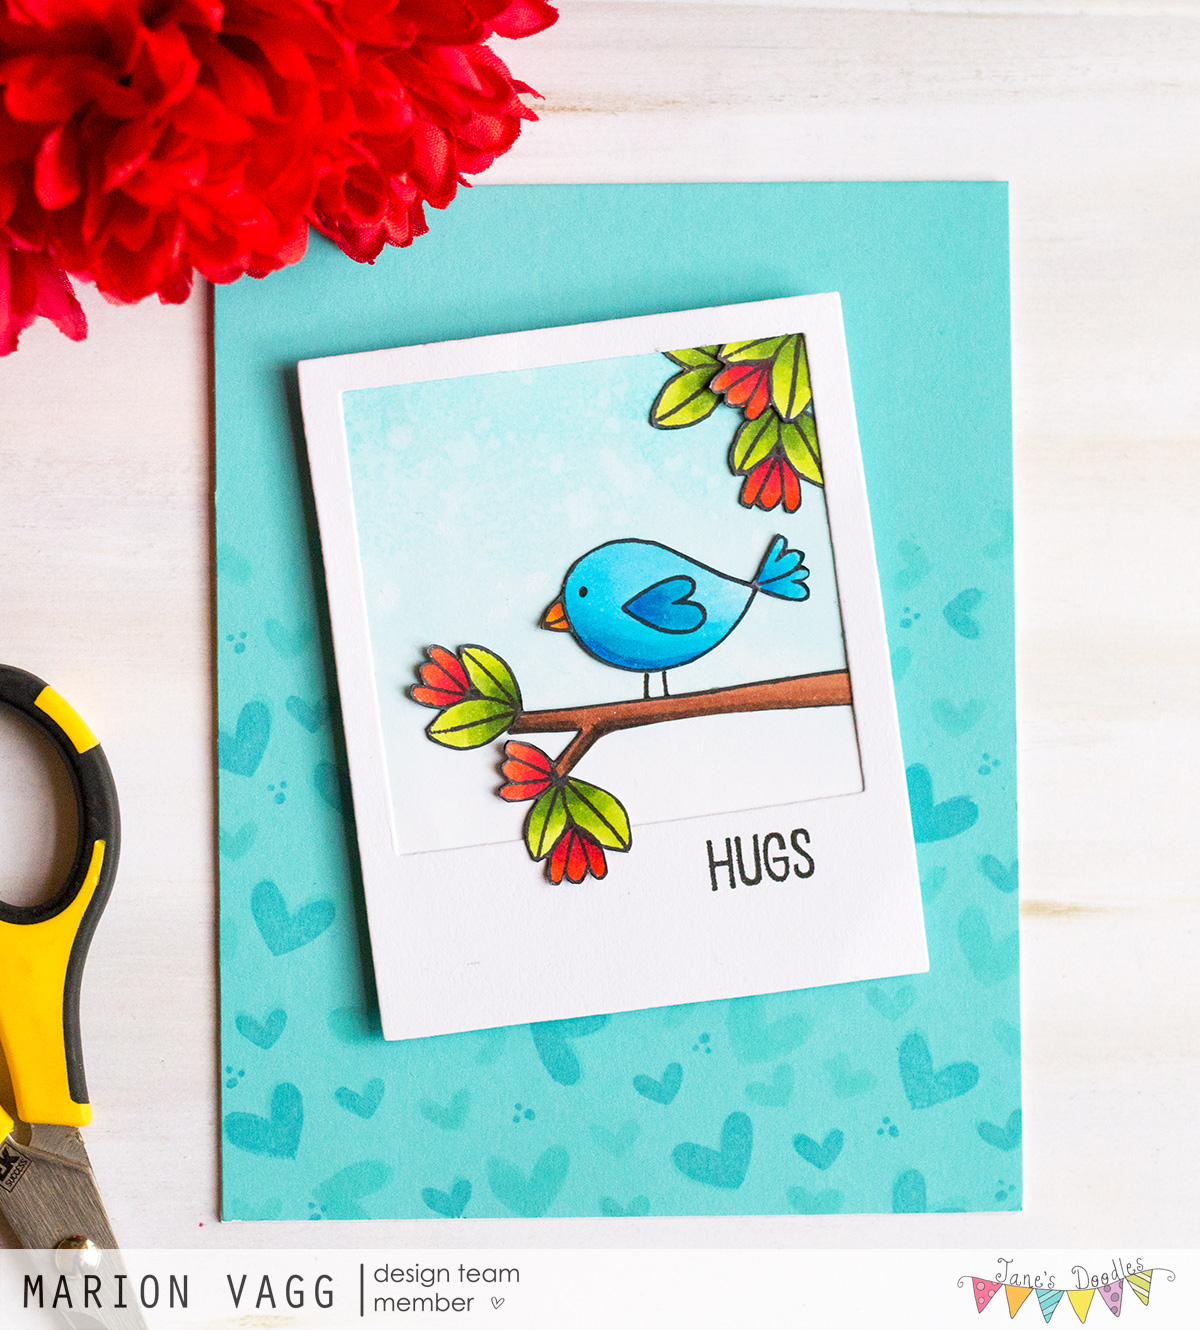
I have a sweet card to share with you today featuring Jane’s Love Birds set. I simply adore this set! Head over to the Jane’s Doodle blog to see the post there.

I wasn’t sure where I was going with this card, so when I don’t know, I usually just stamp, colour (in this case with Copics) and fussy cut the images. This is what I did with this one. To add some interest to the blue card base, I stamped some hearts from the Love stamp set to create a tone on tone effect – subtle and not too overpowering.

Supplies

Stamps: Jane’s Doodles Love Birds and Love stamp sets

Card: X-Press It blending card, Hero Arts layering papers – Cerulean

Ink: Memento Tuxedo Black ink, Hero Arts Shadow ink – Pool, Soft Pool, Distress Ink – Salty Ocean

Other Supplies: Copic Markers, Fun foam, Lawn Fawn Say Cheese die, Cuttlebug, Ink Blending tool

Thanks for stopping by,

Marion

Save

Save

Read More

Love You and Hello – Jane’s Doodles

Jane's Doodle Banner

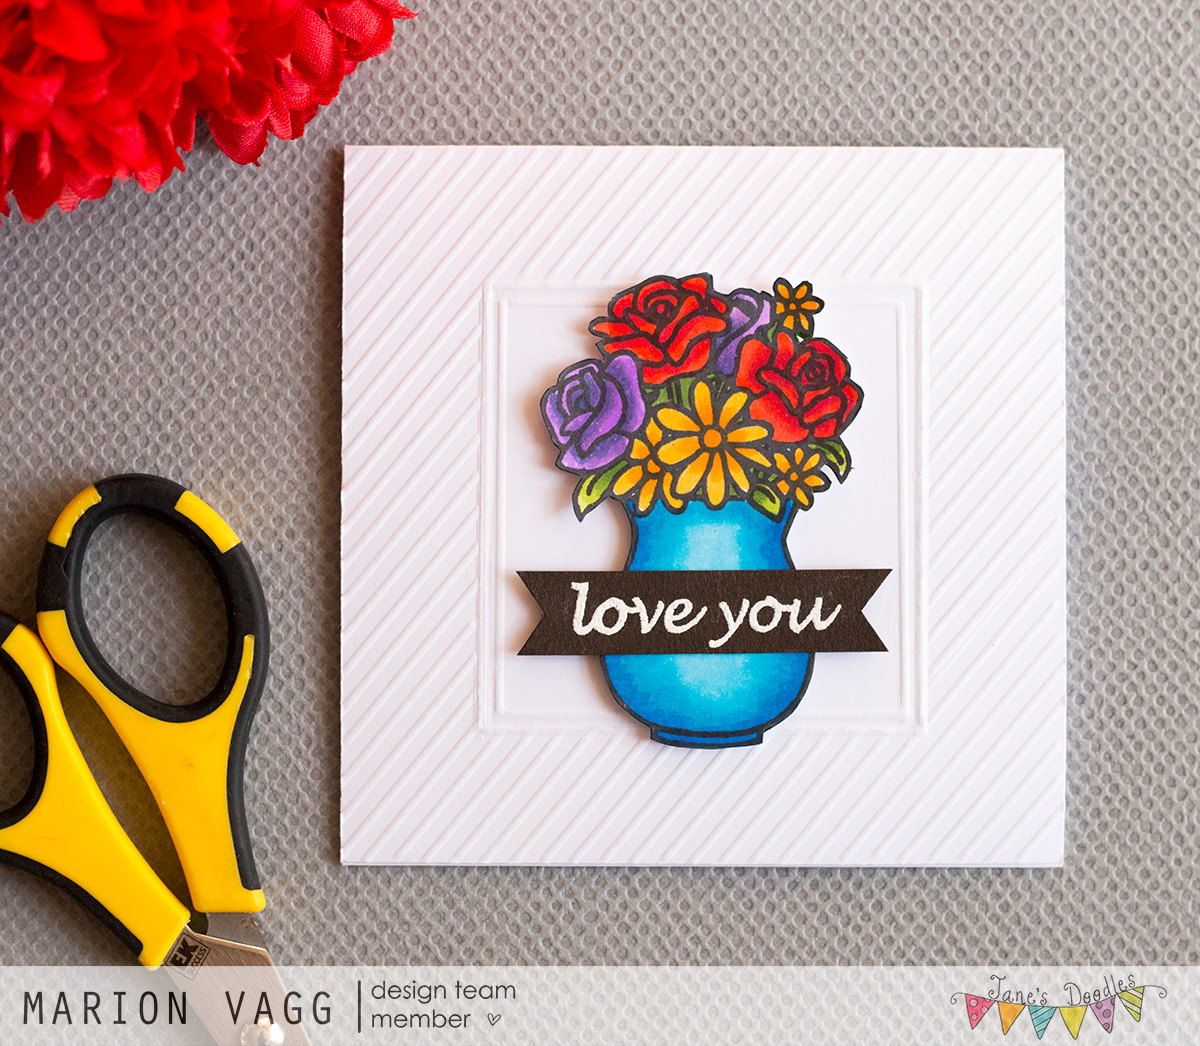
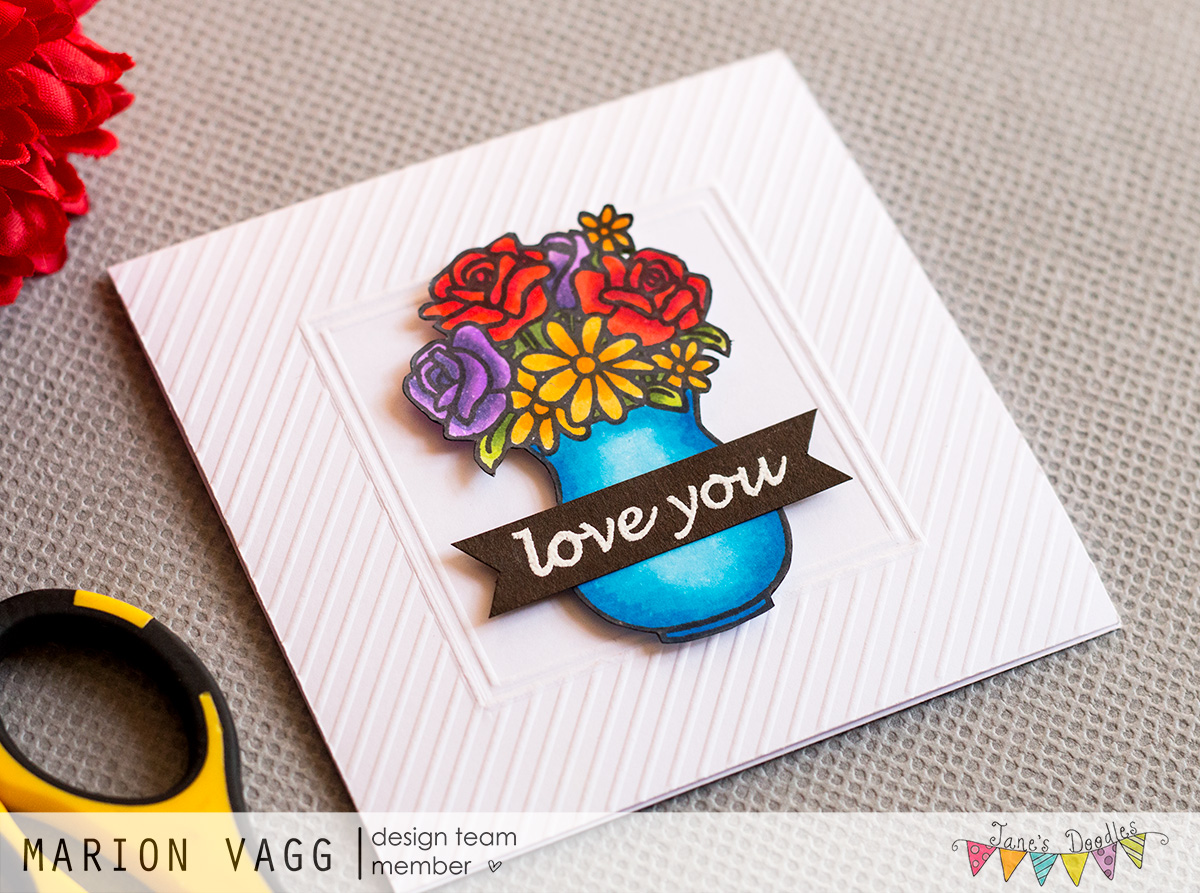
With Mother’s Day just around the corner, I thought I would get in nice and early with making a card for my Mum. You can find it on the Jane’s Doodle blog.

I stamped the image from the Mom stamp set and coloured it with Copic markers. I white heat embossed the sentiment (from the same set) onto some black card stock. It’s a rather small 10cm square card (4 inches square).

For the background, I used my scoreboard and scoring stylus to create a subtle border. I think it frames the vase well, adding a textural feature.

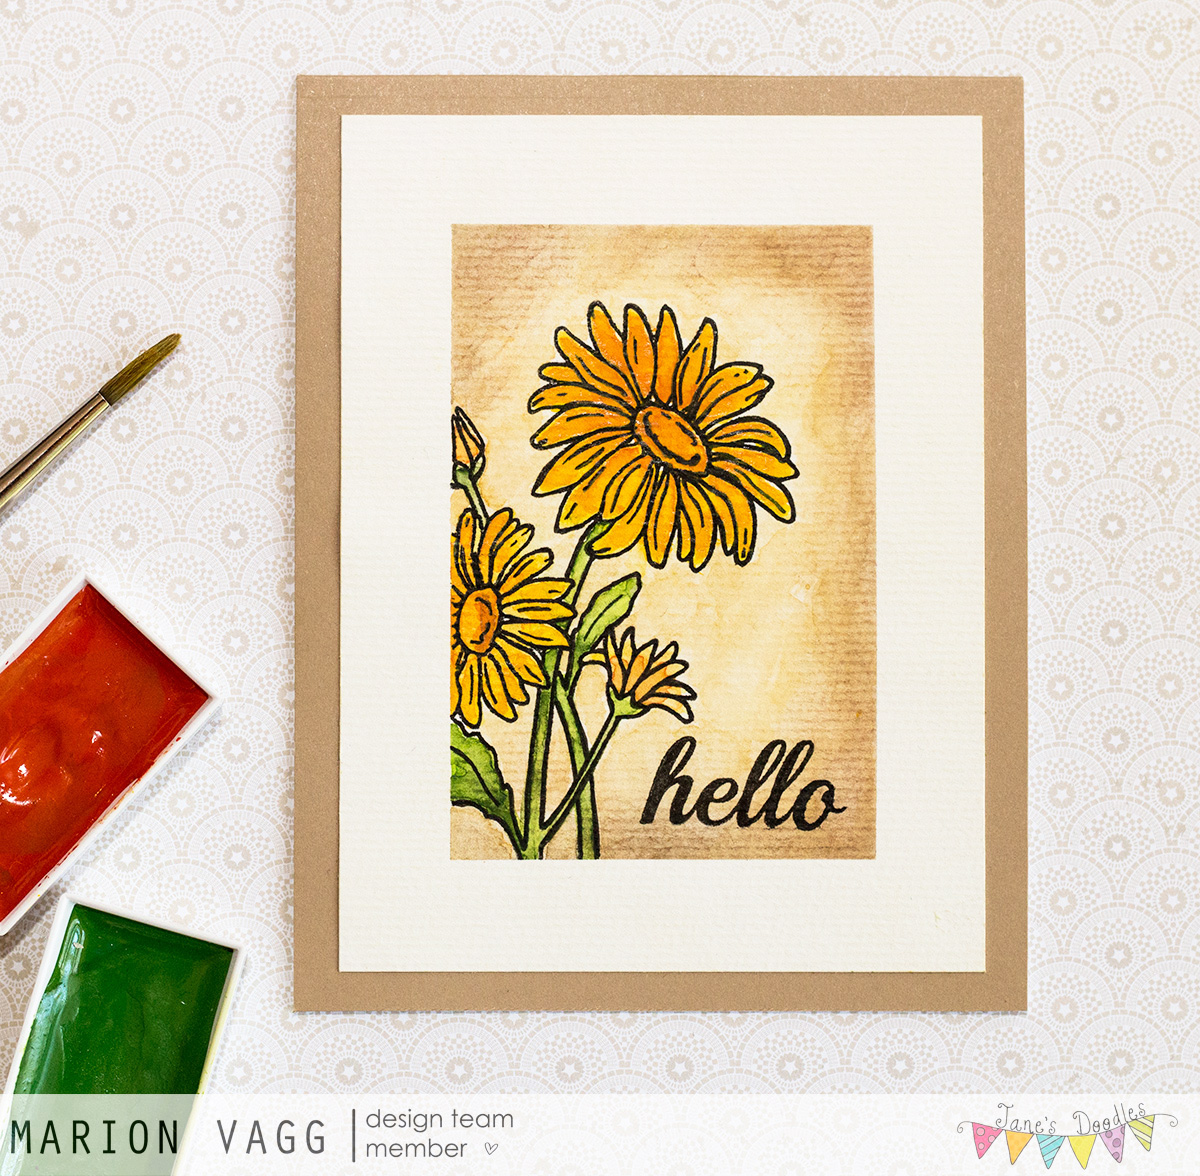
And before I go, I forgot to share another card that was on the Jane’s Doodle blog several weeks ago. It used the Daisies stamp set. I masked then stamped the images onto watercolour card stock and coloured them Gansai Tambi watercolour paints. I added some brown Distress ink to the edges before removing the border masks.

Supplies

Stamps: Jane’s Doodles Mom stamp set

Card: X-Press It blending card, Black card stock

Ink: Memento Tuxedo Black ink, Versamark watermark ink

Other Supplies: Copic Markers, Martha Stewart scoring board, Scoring stylus, Foam squares, Hero Arts white embossing powder, Heat tool, Anti-static powder bag

Thanks for stopping by,

Marion

Save

Save

Save

Read More