Happy Anniversary – Penny Black

simplicity sister

Hello. I hope you are having a relaxed weekend. Today I have a Penny Black card to share with you. This card uses a very different colour scheme to my usual go-to-bright-and-happy-colours, but it is good to stretch oneself and try something new.


PB Happy Anniversary | Marion Vagg

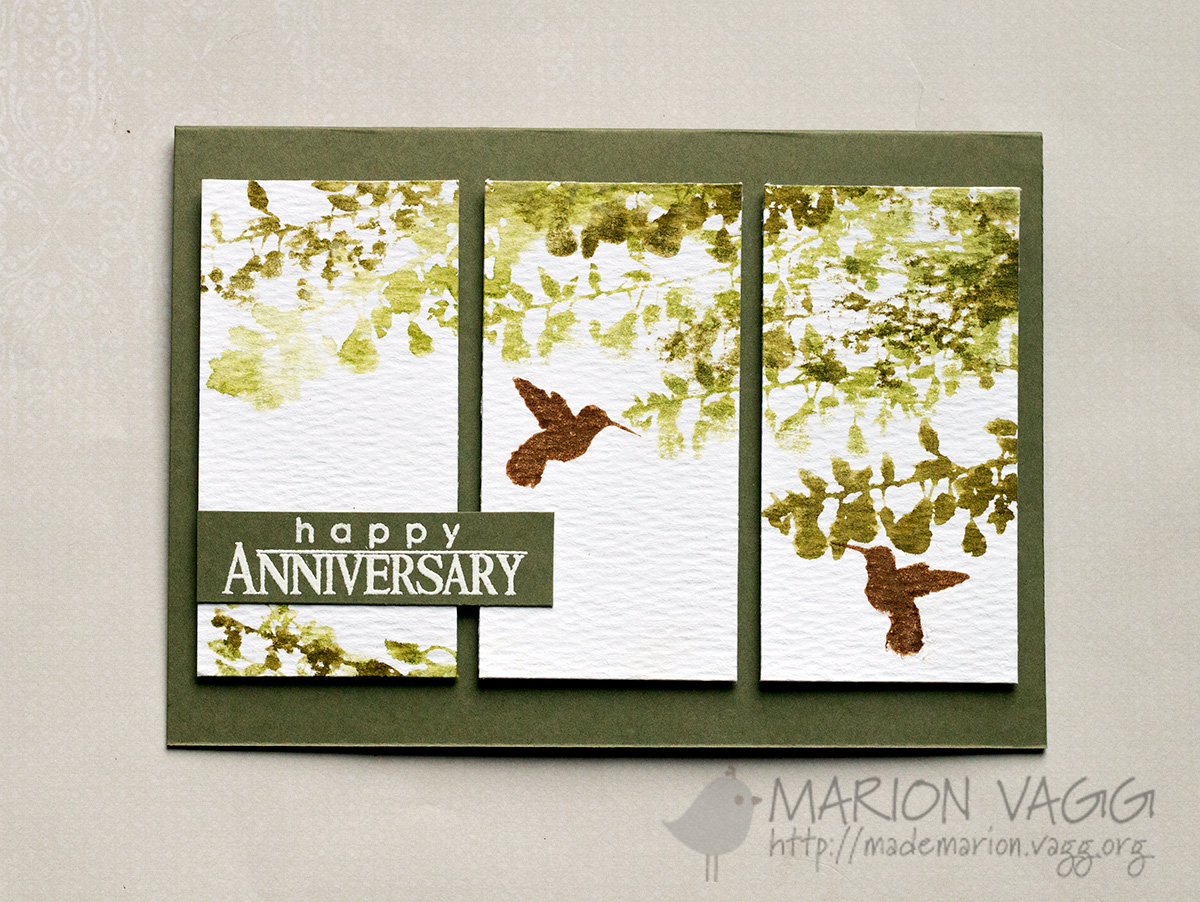
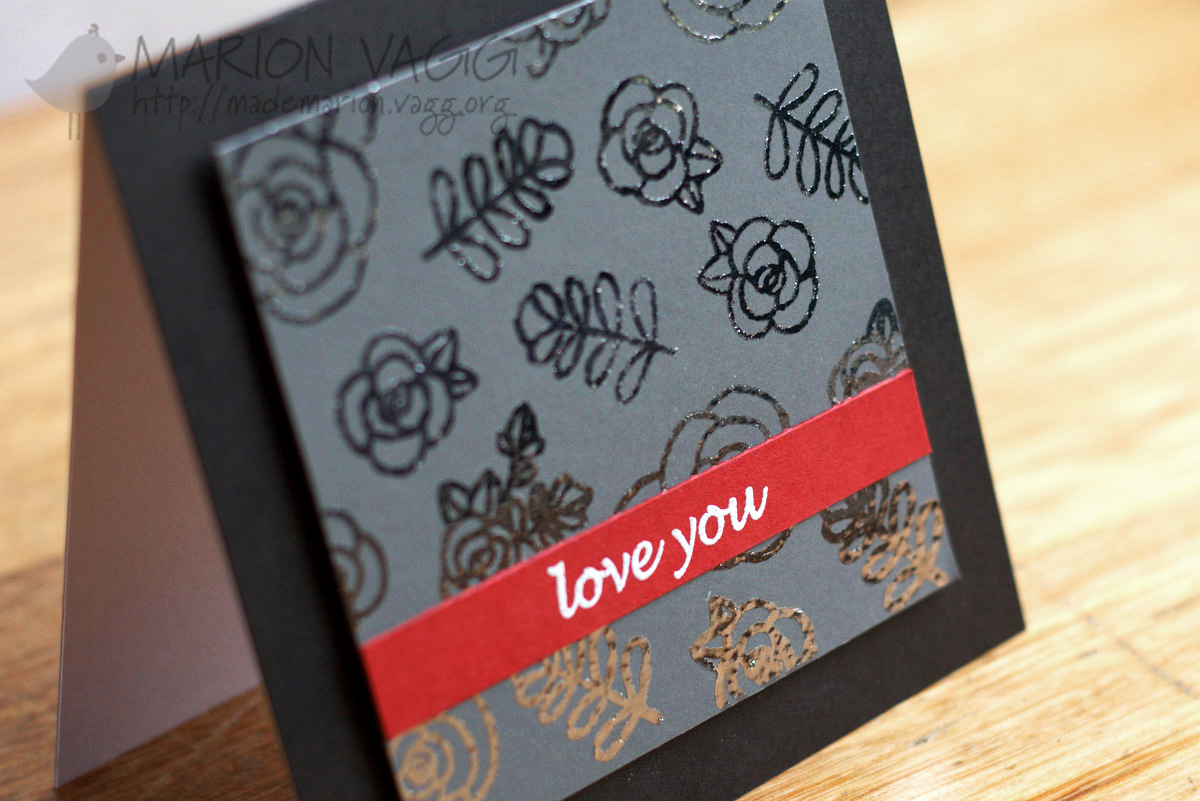
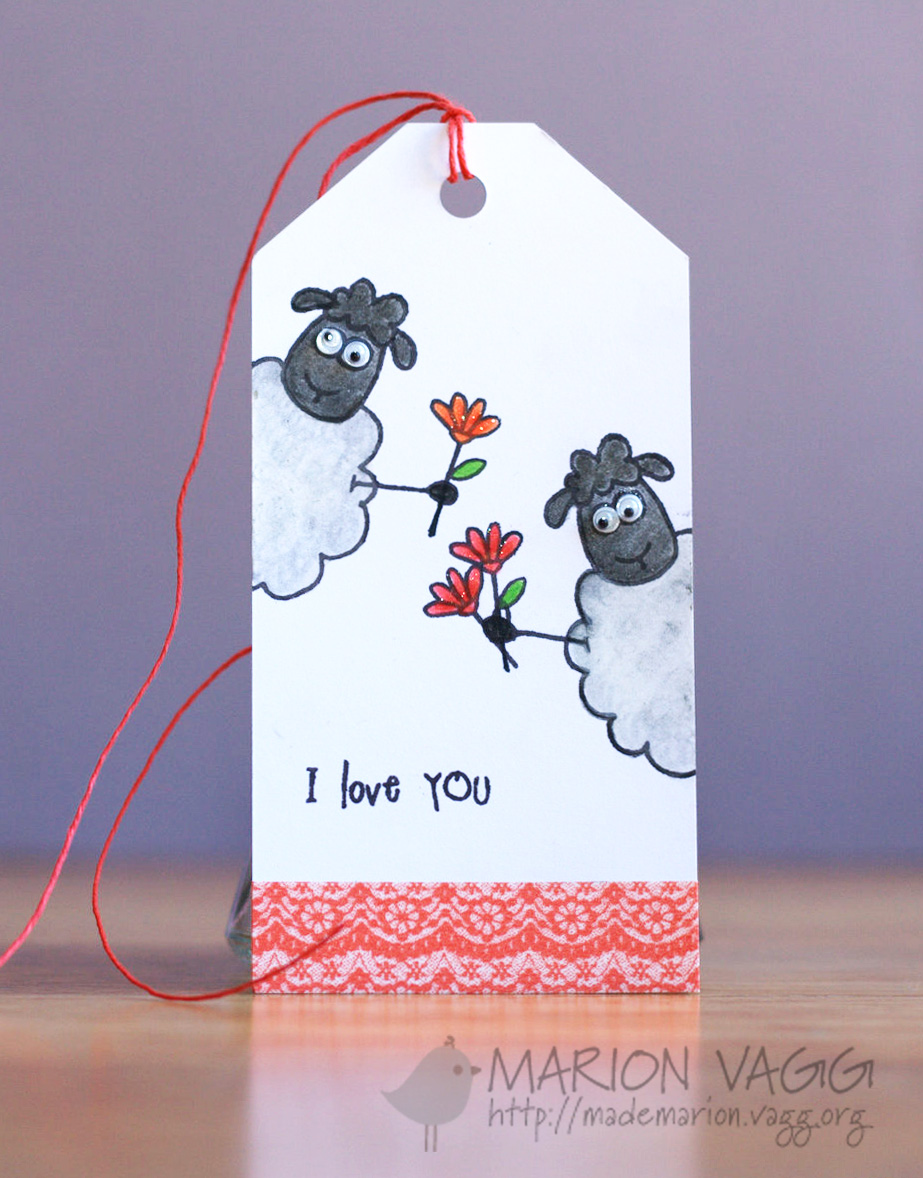
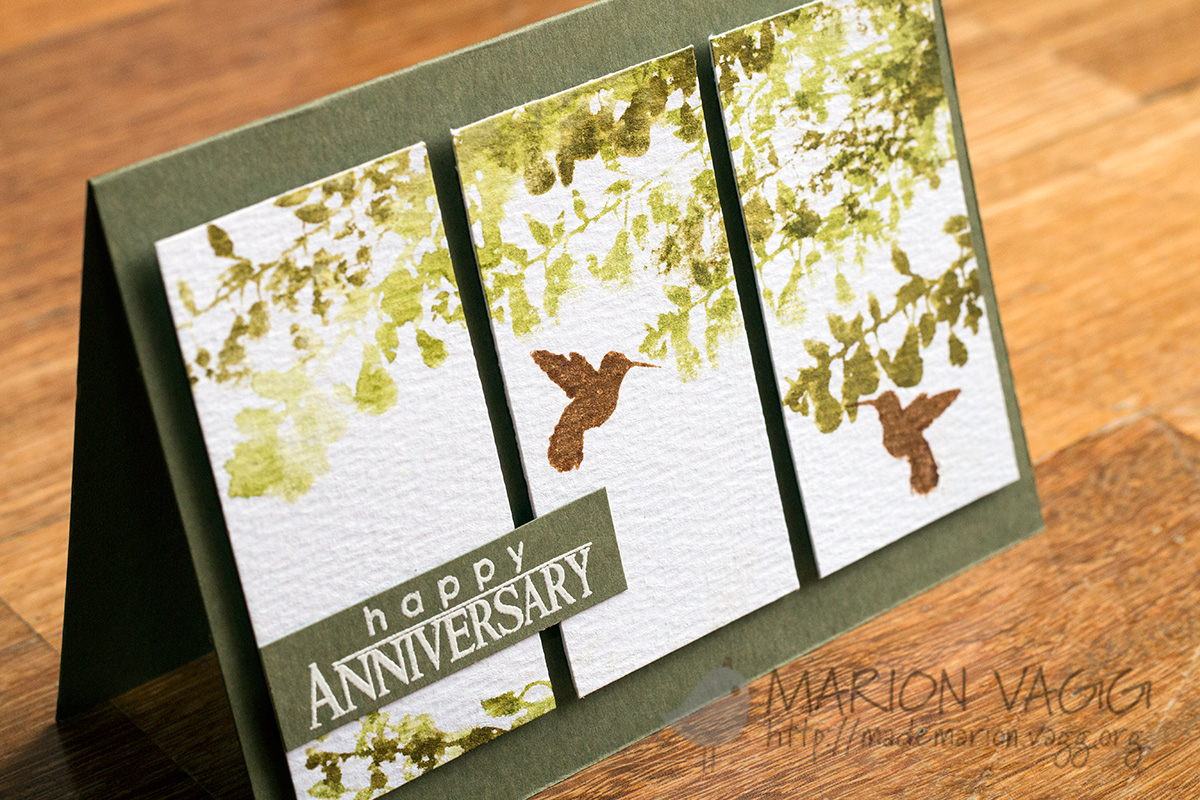
I inked up the Penny Black You + Me stamp set with Distress ink. I then stamped the image off onto a scrap piece of paper before spritzing it with some water and stamping onto my watercolour panel. I used two shades of green distress ink (Peeled Paint, Forest Moss). I hit it with my heat gun after each stamping to ensure the watercolour didn’t run. The birds were stamped with Vintage Photo distress ink. Once dry, I then cut the panel into three equal segments before mounting them into a khaki card base.

PB Happy Anniversary detil | Marion Vagg

Penny Black products used:
You + Me stamp set

Supplies

Stamps: Penny Black You + Me stamp set

Card: Tim Holtz Watercolor card stock, SSS Khaki card stock

Ink: Distress Ink – Forest Moss, Vintage Photo, Peeled Paint, Versamark ink

Other Supplies: Foam dimensionals, Hero Arts white embossing powder, heat tool, water sprayer

Thanks for visiting today,

Marion

Read More

I Love You – Sunny Studio

Hello! How has your week been? School started back this week. Can’t believe my kiddos are in Yr 1 and Yr 4.  I’m also back in the classroom. I have a lovely class and am excited about the new year ahead – although I need a few more hours in the day to get everything done. Too much to do, not enough time. Can you relate?

Anyway I have a new card up on the Sunny Studio blog. Rather clean and simple, but perfect for that someone special. I am loving the new stitched heart dies and I created my own sentiment with the Sweet Script stamp set. The banner is from the Sunny Border stamp set and it too has coordinating dies.

Sunny Studio - I Love You | Marion Vagg

When I first made this card it looked very flat to me – something was missing. So I left it and walked away. I then had the idea to add some subtle shading with Copic Markers to the banner, and it was just what it needed – oh and the heart needed a coat of Wink of Stella as well!

Sunny Studio detail | Marion Vagg

Supplies

Stamps: Sunny Studio Sweet Script stamp set

Card: X-Press It Blending card, Co-ordinates card stock – Grey

Ink: Memento Tuxedo Black ink, Hero Arts Shadow Ink – Raspberry Jam, Distress Ink – Festive Berries

Other Supplies: Sunny Studio Sunny Border Die set, Sunny Studio Stitched Heart die, Cuttlebug, Copic markers,  Blending tool, Foam dimensionals, Wink of Stella glitter brush pen (clear)

Thanks for stopping by,

Marion

Read More

Love You and Hello – Jane’s Doodles

Jane's Doodle Banner

Hello. I hope you have had a fabulous Monday and a great weekend. I’ve just had 2 very lovely days with my Mum, two sisters and my niece in Sydney. We went to see Matilda on Sunday night and it was a brilliant show! I’m back home now and feeling tired, but I’m on holidays, so I’m going to take things very slowly!

I’m popping in with a couple of Jane’s Doodles cards that were over on the Jane’s Doodles blog recently.

First up is this floral card and I love how easy it was to create. I white heat embossed the image from Spring Blessings onto coloured card stock and then did some simple colouring with Copic markers.

Love You JD | Marion Vagg

Love You detail JD | Marion Vagg

Next up is this hello card that uses the Jane’s Doodles Mom set. Lots of fussy cutting, but I find that quite relaxing. And I also used some patterned paper. Go me!

Hello Friend | Marion Vagg

Supplies

Card 1: ‘Love You

Stamps: Jane’s Doodles Spring Blessings stamp set, Jane’s Doodles Mom stamp set (sentiment)

Card: SSS Woodgrain card stock, Pink card stock (SSS – I think??)

Ink: Versamark

Other Supplies: Copic markers, Die-Namics Stitched Rectangle Stax die, Cuttlebug, Anti-Static pillow, Hero Arts white embossing powder, Heat Tool, Mounting foam

Card 2: ‘Hello Friend

Stamps: Jane’s Doodles Mom stamp set, Jane’s Doodles Hello Friend stamp set (sentiment)

Card: X-Press It Blending card, Black card stock

Ink: Memento ink – Tuxedo Black, VersaFine – Onyx Black Ink

Other Supplies: Copic markers, Spellbinders Circle dies, WPlus 9 Hand Written Hello die, Patterned Paper, Mounting Foam

Thanks for stopping by,

Marion

Read More

Shoot for the Stars and Love You!

Jane's Doodle Banner

Hi there! I have been rather absent from crafting and blogging of late. But before I tell you why, I have had some cards over on the Jane’s Doodles blog that I thought I would share with you.

First up was this card using a stamp set of Jane’s that is no longer available called Space. I didn’t know it had been discontinued at the time I made this card (but hopefully Jane will change her mind and bring back this little cutie! I mean, who doesn’t LOVE an alien?) And while you are there, check out Miriam’s card! Stunning!

JD Shoot for the Stars | Marion Vagg

JD Shoot for the Stars detail | Marion Vagg

Next up was this card. I managed to get my hands on some foil recently and was itching to use it. It uses one of Jane’s newest sets called Mom.

JD Love You | Marion Vagg

JD Love You detail | Marion Vagg

I have discovered that photographing foil is REALLY hard. The photos don’t do it justice, so hopefully the following gif will help you see how pretty and shiny it is in real life.

JD Love You detail | Marion Vagg

This foil card was actually the first card I have made in over a month! Why? Well we have just returned from an overseas trip to the USA. My husband travels to the US quite regularly for work, and we were privileged to go with him this time. We had 2 weeks in and around San Diego, and then spent the last week in LA where we just had to go back to Disneyland! Here are a few highlights from our trip.

Emma and I got to hang out with some Lego friends at Legoland CA.

Legoland SD | Marion Vagg

My kids playing at the beach at Oceanside CA.

Oceanside | Marion Vagg

Meeting Pluto and Pooh Bear at Disneyland CA.

Pluto | Marion Vagg

Pooh Bear | Marion Vagg

We had a great time and it was fun exploring a new part of the world. I might have managed to pick up a few crafty goodies along the way as well 🙂

Supplies

Stamps: Jane’s Doodles Mom stamp set

Card: Hero Arts Layering Papers – Black, Grey, SSS card stock – School House Red

Ink: Versamark ink

Other Supplies: Hero Arts clear embossing and white powder, Heat tool, Anti-static powder pillow, Deco Foil – silver, Laminator, Foam squares


Thanks for visiting and for lasting through this long post!

Marion

Read More

Shaker tag – Jane’s Doodles

Jane's Doodle Banner
I am feeling somewhat under the weather at the moment, so not much creativity has been happening of late – just a lot of coughing and sniffling. But a couple of weeks ago I did manage to create my very first shaker project – a tag! I have been watching and admiring this trend for probably over a year now – and not being one to jump into things too quickly, I decided it was FINALLY time to give it a try. After all the videos I’ve watch on shaker construction, one would think I would be able do it first time round, but it still took me 3 goes to get it right. But I do think it is a lot of fun! My daughter gave it the nod of approval and was very happy to claim my reject attempts.

Shaker Tag Jane's Doodles | Marion Vagg

Shaker tag detail | Marion Vagg

And I just realised that I never posted my last Jane’s Doodles tag using the adorable Seamus stamp set. This guy makes me smile. I think the guy in the top left certainly does have crazy eyes as Jane mentioned in the post 😉 Crazy in love maybe?

Seamus tag JD | Marion Vagg

Supplies

For You Shaker Tag

Stamps: Jane’s Doodles Spring stamp set, Jane’s Doodles TEAriffic stamp set (sentiment)

Card: X-Press It Blending card

Ink: Memento ink – Tuxedo Black, VersaFine Onyx Black

Other Supplies: Prismacolor pencils, Derwent blending pencil, Zig Wink of Stella brush glitter pen, Googly eyes, Washi tape, Red hemp twine

I Love You Tag

Stamps: Jane’s Doodles Seamus stamp set

Card: X-Press It Blending card

Ink: Memento ink – Tuxedo Black, VersaFine Onyx Black

Other Supplies: Copic markers, Penny Black Chat Bubbles die, Cuttlebug, Fun Foam, Googly eyes, Shiny star, Prismacolor pencils, Simon Says Stamp Moonshine sequins, Red satin ribbon, Acetate, Hemp twine, Glossy accents.


Thanks for visiting. I do appreciate it,

Marion

Read More

Muse Challenge #100

muse_logo

Can you believe that this week is the 100th Muse Challenge? AND not only that, but it is our 2nd birthday and Michele (our new DT member) is kicking off the celebrations at the Muse Card Club this week. In honour of this huge celebration, we’re going to have special prizes – 5 lucky participants (you need to link up a card) in this week’s challenge will be selected at random to receive some blog candy! The names of these lucky winners will be included in the Voting Results post for this challenge, next Tuesday at noon.
Here is Michele’s card…

Muse 100
And here is mine. I am joining in on the festivities just for fun this week.

Love you | Marion Vagg

You are probably wondering where the theme ‘accentuate the negative’ is. Well when I got a little peeky at Michele’s card last week…I didn’t realise there was going to be a theme and I made my card based on her heart theme. And I am sure there is song out there somewhere called Love You…

Love you - detail | Marion Vagg

Hope that you will join us in the festivities this week.

For the full Muse challenge guidelines go here.

Supplies

Stamps: None

Card: X-press it Blending card

Ink: Distress Ink – Picked Raspberry, Spiced Marmalade

Other Supplies: Ink blending tool, Post-it Masking tape, Simon Says Stamp ‘You’ die, Cuttlebug, MFT Die-Namics Heart Stax die, Simon Says Stamp Moonshine sequins, Glossy Accents (to adhere sequins).

Thanks for stopping by.

Marion

Read More